Presenting and Selling a PoE Based Lighting and Automation System

Presenting and Selling a PoE Based Lighting and Automation System

Presenting and Selling a PoE Based Lighting and Automation System

When you’re ready to start seeing your business grow through PoE lighting and automation, join us as we show you the in’s and out’s of how to sell PoE based lighting and automation.

Are You Ready to Expand Your Business by Offering a New Level of Technology to Your Customers?

If you’re here, I’m guessing you’ve seen PoE lighting and you’re convinced that it’s the right choice.  But frankly that’s simply not enough, is it?  Unless you have customers paying you to install it, a PoE lighting and automation system remains an interesting technology that will happen someday in the future, but it’s not making you money today.  You need to know how to earn valuable PoE lighting customers today.

I’m Tyler Andrews, CEO and Owner of PoE Texas, and I spend a good share of any given day selling PoE lighting and automation as a concept to owners and developers.  I’m going to share how I help owners agree that PoE Lighting and Automation is the right solution for them today.  Let me show you how.

You can watch the video training . . . or just download the presentation at the link below.

PoE Lighting and Automation

Visit our PoE Lighting and Automation section to learn more, download the product catalog, or download the designer tool kit with template drawings and technical information you need to get started.

Let’s start where every good business starts, with the opportunity and why you should take the risk of trying to sell PoE Lighting and automation systems.  The reality of COVID and 2020 has highlighted that the purpose and function of offices and buildings is evolving.  

In a recent EC&M report, industry experts highlight that Integrated Building Management Systems are going to grow by 12% year over year with the overall industry growing by almost 11 billion dollars in the next four years.  

Despite the growth potential, the market is still highly fragmented leaving room for innovation to enter and drive the market.  

And most interestingly of all, industry experts agree that the key driver is the advent of IoT which brings the intelligence of the internet to our daily experience with the world around us.  It is clear that the market has a pent up demand, so who is demanding this automation?  Is it restricted to the Apples or MIT’s of the world?  Let’s talk about who you’re looking for.

Who is this huge potential market?  Our assessment shows you’re looking for buildings and spaces less than 200 thousand square feet and that need to attract occupants or satisfy regulatory requirements through technology.  Who are they?

They are bars, restaurants, legal offices, insurance agencies, doctors offices, and the industries serving larger technology companies.  They are schools and training centers.  They are new builds, tenant finish outs, and renovations.   

And intuitively for every new $5B Apple campus, there are thousands and thousands of these smaller projects happening every year in the US alone.

And they’re not finding the solutions they need.  Why?

The reality is that existing building technology has developed into siloed islands making the adoption of integrated systems too costly for most businesses and institutions.  

For example, your blinds can’t inherently communicate with your lights which in turn can’t communicate with your access control or HVAC.  You have to pay a premium to have one technology silo communicate with another.  

Even if you invest in the proprietary intelligent systems available, you end up with scattered, unorganized analytics of the data you’re paying to collect.  

The only way to overcome these barriers is through another layer of costly, complicated systems that are perpetually out of date as more new siloed technology comes out.  

However, even with this in-efficient, costly approach using technology from the last century, the integrated building market is one of the fastest growing market segments in construction.  All of this leaves the door open for a technology and business model that can become a game changer in the market.

That’s where you come in.  Power Over Ethernet offers the integrated level of technology users and organizations like LEED, WELL, and municipalities are expecting at a cost businesses can finally afford.  You can integrate powered systems and offer facilities a 36 month RoI by bringing down the capital expenditure for such a system by 30% and driving down utility and labor costs by up to 40%.  The right PoE partner makes IoT available and the obvious choice from a business perspective.

So who are you targeting with this information?  And where do you find them?  

You’re looking for owners and operators who need lighting and automation controls and want to differentiate themselves through technology.  

To be clear, you’re not looking for someone trying to find a cheaper alternative to existing simple function light switches.  PoE Lighting and automation packs far too much intelligence to compete with a $5 light switch and $50 light fixture.  

Yes, do look for schools and campuses.  However, broaden your net to include your current customers doing restaurants, physicians offices, retail stores, lawyers offices, insurance agents, and high-end homes.  Done right PoE lighting and automation should benefit all businesses.

A quick note here about finding and helping someone decide to test out PoE lighting and automation.  All decisions are emotional.  Scientific studies have found that people make decisions based on emotion after they’ve considered a situation analytically.  So . . . 

Come ready to sell them an experience and an idea of what their life and business will be like after they’ve installed their PoE lighting system.  We have found that videos and real life experiences make the biggest impact on potential customers.  Bring them either to a live or virtual demonstration where they can touch and feel the experience of interacting with automated lighting.  For example, we have a quick demo intro video used to drive that initial interest in the products.

Then, you bring up questions of how PoE automation helps with code compliance, LEED points, WELL points, Energy Efficiency, and most importantly style.

And, timing is everything.  So let’s talk about the best time to talk to potential customers about PoE lighting and automation.  Your goal is to have a conversation with them as early as possible.  In project management terms this is often called the Concept or Planning phase.  The goal is to have them considering a PoE automation system before they’ve staffed a lot of consultants.  Why?  Because early on you only have to sell to a couple people.  Once a project gets architects, consultants, designers, and contractors, you basically have to sell to everyone on the project including electricians whose scope you’re likely taking.  At that point, it’s a lot of work with a low likelihood of success.

Speaking of decision makers, getting in front of the owner and decision makers is where smaller projects and your position as the ICT installer becomes most valuable.  It’s a little known secret that owners rarely bid out their ICT installations more than once.  When an owner finds an installer they feel comfortable with, they call that installer back time and time again.  So as ICT installers, you have a unique advantage to get in front of customers.

Now let’s cover the steps you can use to introduce and sell a PoE lighting system to a customer.  First, and foremost, I’m assuming you already know or have met this person before.  If not, you’ll need to do basic discovery on the customer.  However, for this exercise, let’s assume you’ve met this person before and you have an idea they’re interested in a PoE based lighting and automation system.  

Your first step is to request a meeting with them to learn more about the potential project they may have.  You may be tempted to come to this meeting loaded for bear with every bit of potential information the customer may potentially have.  You’re ready to stand up and shout from the rooftops about why they should do PoE lighting.  

DON’T

Do come with a short introduction slide deck ready in case they sit back and ask to see what you have.  That deck should have some higher level benefits for the customers on why PoE makes sense.  For example you could crib the first part of this presentation.

However, your main goal for the first meeting is to understand their project needs.  If they’re willing to tell you what the project is, what the customer needs, and what they hope to get out of it, that’s 24 karat gold.  You ask questions, you listen, you give them the floor to tell you what they need.

Then at the end, you ask if you can schedule a follow up meeting to demonstrate how you can provide them what they need.  For example, you could offer to do a preliminary design or you could ask to meet again for you to present some concepts that would hit their needs.  Your goal is for this next meeting to demonstrate to the potential customer that you’ve really understood their needs.

You may need to redo meetings one and two a couple of times, however, at each meeting you should ask if now is the right time to get a preliminary quote.  Let’s discuss quotes for a minute.  Customers may ask for quotes right up front, usually without even having shared the design with you.  What they really want to know is whether they can afford all of this before they invest a lot of their time and effort to help you put together a detailed proposal.  

The answer is, yes, you can help them create a “budgetary quote” with very little design.  In order to get a final quote, however, you’ll need design material such as a reflected ceiling plan, electrical plans, and any specifications including division 25, 26, and 28.  If your customer is small enough, they may not have any of that.  At which point, I recommend you download an app like MagicPlan, take the dimensions of their space, and use that to make a quote.  

You do need to get a quote to them because no client has ever installed something that wasn’t quoted first.

Finally, expect to do a lot of follow up.  Don’t be bashful about it.  Any good customer is usually so busy they appreciate someone who will help them not miss an opportunity.  Simply be pleasant and consistent when you reach out.  And, don’t hesitate to be upfront in asking if they’d rather you stopped reaching out to them after the first time or two.  It will save you time and reduce their hassle.

[Slide]

So, where does PoE Texas help with all of this?  Most importantly, you should know that you’re not alone.  At PoE Texas, we’re set up to support installers and contractors like you to be successful.

We will help provide you with proposal and marketing materials from Power Point slides to YouTube videos to offers to visit existing or demo facilities

We can support you in creating preliminary designs for an automation system  for customers and specification information they could use as needed.

Most importantly, we dedicate a resource to you so you know who you can turn to when you need information or support.

And the kind of support you can expect is rapid quote turn around time.  You can expect preliminary quotes in a matter of hours and detailed quotes with design information in a matter of days.

Let me be clear.  You can know we support customers and installers from concept through completion into operations.  Because we’re an experienced team with a background in project management, we know what it takes to make a project successful.  We’ll be your partner all the way through the process with the right hardware and support.

I’ll end on this point showing you the team behind you in your sales effort.  You have a bench of experienced industry professionals who want to see you succeed in your process to become a PoE lighting and automation installer.  So, you’re not going into this alone, and you have this team dedicated to your success.

Thank you very much for making time to watch our presentation on how to sell and present PoE lighting and automation.  Obviously we can’t pack everything you need to know in a 30 minute presentation, and this is just a starting point for you.  However, we’re happy to help you manage this process for your business.

If you’d like to learn more, you can find all of our resources at www.poetexas.com or on our YouTube channel.  You can also reach out to us at success@poetexas.com to speak directly with a PoE expert.

We wish you the best with the rest of the show this week and look forward to seeing you at the next BICSI show or catching up after the show.  We’ll see y’all next time!

Ready to Talk to Someone to Learn More?

Drop Us a Line to Schedule a One-on-One Consultation

11 + 14 =

GPOE-2B

GPOE-2B

GPOE-2B

(PoE Gigabit Injector)

Welcome to the PoE Texas Manual for the GPOE-2B that cost effectively upgrades any non-PoE switch or PoE switch to 2 ports of 30 watt passive PoE which allows you to connect any two PoE devices like a Point to Point Wifi Extender.

The purpose of the manual is to help you quickly and effectively navigate the installation and functions of your new Power Over Ethernet Midspan.

Our goal is to make our products as intuitive and simple to use as possible, so we value your feedback and questions directly to us at service@poetexas.com.  Phone +1-512-479-0317.

Or you’re always welcome to leave questions or comments on our product pages: GPOE-2B

What’s Inside

GPOE-2B

PARTS LIST:

  • 1 X GPOE-2B

This Injector is sold without a power supply. 


Additional items you’ll need not included:

1 – Screws for mounting

2 – Power supply

3 – Patch cables to the switch and home run cables to the device


NEED HELP PICKING A POWER SUPPLY?  USE OUR POE CALCULATOR TO CREATE A POWER BUDGET.

General Installation

CONFIGURATION

There is no configuration necessary with this device.  Simply plug it in.

The green LED indicates power on.   If the green light begins to blink at any time, it is an indication that one of the POE ports has shorted out or overloaded.

STEPS:

1 – Unplug the POE ports one at a time to determine which port is having the issue

2 – Troubleshoot the port to determine whether the cable or the device is grounded

Technical Specifications

Product Specifications

Data + PoE Ports 1
Data Ports 1
Data Rate Gigabit
Dimensions 1 x 1 x 2 in.
Input Voltage Range 12 – 56v DC
Max. Amps Per Port 650 mA
Mount Type Wall
Operating Humidity 5% to 90%
PoE Method Passive
PoE Mode/Pinout Mode B (+4,5 -7,8)
Power Input 2.1 x 5.5 mm DC
Power Supplies None
Weight 1 oz

If you find this learning center helpful, like and subscribe on your social channels to learn when we post new guides!

Maximize Your Enterprise Network with PoE

Maximize Your Enterprise Network with PoE

Maximize Your Network with the New IEEE 802.3bt Power Over Ethernet

Learn what the new PoE Standards mean and how to take advantage of them to maximize your enterprise network design.

Are You Ready to Get the Most Out of Your Enterprise Network?

Maybe you’ve heard something about the new PoE standard that offers 90 watts of Power Over Ethernet.  But what does that really do for you and your network?  Is it just interesting or is there something you can do with all that power?  Read on while I show you how to take full advantage of IEEE 802.3bt PoE on your Enterprise Network.

Or watch the video training . . . or just download the presentation at the link below.

I discuss interesting products in this post that change fundamentally how you layout and design networks.  As you read or watch, you can use the links below to find those products.

PoE Lighting and Automation

Convert PoE to USB-C for iPad, Surface, and More

PoE In-wall Devices for Enterprise

Convert POE for NUC, Raspberry Pi, and More

Let’s start by discussing what is IEEE 802.3bt PoE in practical terms.  If you’d like, you can read the full standard with all of its details, however, spoiler alert, power and data get together in the end.  In all seriousness, when you’re considering IEEE 802.3bt, here’s what you really need to know:

  • It was ratified in 2018 meaning it is a fairly new technology so not every manufacturer will have integrated this into their product line
  • It also hasn’t figured out what to call itself yet.  You’ll find companies call it PoE++, UPOE, UPOE+, 4PairPoE, and more.  
  • It also comes in two types:
    • Type 3 means it was based on Pre-standard PoE, gives you 60 watts of power, and requires dual signature which means it will not necessarily work with Type 4 PoE devices
    • Which is the new standard, Type 4, gives you 90 watts of power, and does a single signature
  • Since we’re at BICSI, you’ll want to know about the cables.  Standards typically call for CAT 6 or a CAT 5e that has been designed for 4PairPoE. Check the cable specs on this.
  • A quick note, though, there is some planned power loss on even the bigger cables meaning you should only plan on 72 watts at a device even if you get 90 watts at the PoE switch.

So, let’s answer the question of why you would choose to maximize your network with PoE.  Or in other words, why would you or your customers invest in upgrading to IEEE 802.3bt?  Simply put, it’s all about saving money.  PoE projects normally save 30% on any given project compared to conventional technology and give you a 36 month RoI.

How do you get that savings?  With IEEE 802.3bt what you get above the savings in manpower and wiring you already know about, you’re able to move processing to the edge using more powerful intelligent devices, which I’ll get into shortly.  It also allows you to integrate more modern technology with some very cool features.  Let’s look at what those kinds of things are.

First let’s add in some new tech important for this discussion. You’ve likely seen the new USB-C connector on phones or tablets.  However, you may not be as familiar with what it means from a functional perspective especially in buildings.  Did you know USB-C can charge and do data up to 100 watts with the right cables?  And it can role swap so a charging device can flip to be charged by something connected to it.

But if it’s so cool, why don’t we see it everywhere?  Frankly, it just costs too much to run over 3-5 ft and cannot run longer than 15 ft maximum with extremely expensive cables.  That’s where PoE comes in.

PoE Texas’ patent pending technology converges USB Type C and PoE onto one network.  You can use our new our PoE+ to USB-C converter to charge and send wired data to tablets and phones.  Designed to fit into US and EU wall boxes to allow you to use this for room schedulers, kiosks, digital signage, return to work and school solutions, and more.  With our selection of cables, we can provide power and data to most modern tablets including Microsoft, Apple, Google, Samsung, and more.

We’re also doing pilot testing of an IEEE 802.3bt USB-C dock for enterprise and educational applications.  You can find the cut sheet for it at our BICSI Booth. It has a USB-C charging and data port that will charge laptops that operate at less than 70 watts, which covers most laptops.  Right now schools are handing out laptops to all their students, but they don’t have plans on how to keep those laptops charged at student’s desks.  At best the student remembers their charger which has to plug into power strips and extension cords strewn around the classroom.  This device takes the data load off the wireless network while at the same time charging off inherently safe class 2 power. [I8]

Speaking of charging, our new enterprise grade inwall devices allow you to convert a simple network drop into useful building elements.  We recently launched our PoE+ to USB charging port.  It takes PoE+ in and outputs a dual orientation USB charger  and PoE output port.  Now, your network drop becomes a useful IoT device for your customers.

Or, you can use IEEE 802.3bt PoE to power our miniaturized PoE switch that basically gives you 4 PoE ports for the price of one cable.  In situations where you can’t run more cables and need more ports, you can use this device to get 4x PoE+ capable ports for the price of one cable.

Finally, let’s talk about how you use PoE with your edge processors.  Now you can use PoE++ and PoE to provide power and data to your favorite edge devices including the Intel NUC mini PC, Raspberry Pi, and any DC driven device like thin clients and more.

Whew!  We’ve covered a lot of technology and opportunities with PoE.  As you can see, the new, more powerful PoE and USB-C standards are offering some very new, exciting opportunities for your enterprise network at a device level.

If you’d like to learn more, you can find all of these devices above.  You can also reach out to us at success@poetexas.com to speak directly with a PoE expert.

Finally, I’ll wrap with a teaser for our other posts.  Are you ready to take your ICT and installation business to the next level?   Are you ready to differentiate yourself as a market leader?  Join us later as we talk to you about PoE based lighting and automation and see how to significantly expand what you can offer your customers.  Visit our other posts here in the learning center!

Ready to Talk to Someone to Learn More?

Drop Us a Line to Schedule a One-on-One Consultation

13 + 12 =

GAT-USB-IW

GAT-USB-IW

GAT-USB-IW

Welcome to the PoE Texas Manual for the GAT-USB-IWW that gives you USB Fast Charging and Gigabit data over a single network cable to convert unused network ports into USB charging stations!


The purpose of the manual is to help you quickly and effectively navigate the installation and functions of your new Power Over Ethernet device.


Our goal is to make our products as intuitive and simple to use as possible, so we value your feedback and questions directly to us at service@poetexas.com.  Phone +1-512-479-0317.


Or you’re always welcome to leave questions or comments on our product page: GAT-USB-IW

What’s Inside

PARTS LIST:

  • 1 X GAT-USB-IW Device
  • 1 X Cover Plate
  • 1 X Mounting Screws

You will need a low voltage mouting ring or single gang wall box as well as a home-run data cable.

If you’re looking for a Power and Data over USB Type C solution, check out our AT-USBC-JB.

    General Installation

    Before You Install:

    Yes, this converter will work with a normal PoE (IEEE 802.3af) switch or midspan for 12 watts of power, but in order to also have PoE on the output port and USB charging at the same time you need a PoE+ (IEEE 802.3at).  You can find our more powerful PoE switches here.

    If you already have a PoE switch and want the full PoE+ power, PoE Texas offers midspans that can add PoE+ to any PoE switch.  You can find the midspans here.  Do contact us at success@poetexas.com or 512-479-0317 if you’d like help selecting a product.

    This device includes a bi-directional USB port so no matter what orientation you use, it will fit and delivers up to 12 watts of charging while still allowing the network port to have PoE.

    The installation is simple and only requires a few minutes to set up without specialty tools.

    • Make the home run cable from the main switch: PoE or PoE+ (preferred) in the server room or IDF. 
    • Run the home run cable to the end location where you want your device.  
    • Install a low voltage ring or single gang box.
    • Connect the home run ethernet to the port on the back of the device.
    • The blue power light will turn on and your device powers up.

    CONFIGURATION

    Configuring Your Cisco Enterprise POE Switch for 2 Event PoE Classification

    Yeah, I know that’s a mouthful.  Here’s the simple translation.  Cisco enterprise switches including the 9400 and 9300 models, which is a lot of them, come with a default setting that makes them less compatible PoE+ devices like the GAT-USBC-PD.   You’ll know the setting isn’t right because our device won’t power on correctly, and your device won’t charge.  How frustrating!

    It’s a simple enough fix.  You simply need to configure the ports that will power the GAT-USBC-PD to have 2 event classification.  You can find the Cisco documentation on how to do that here: CONFIGURE MY SWITCH

    Technical Specifications

    Product Specifications

    Certifications CE, FCC, RoHS
    Data + PoE Ports 1x PoE+ Input / 1x PoE Output
    Data Rate Gigabit
    Dimensions 4.5 x 2.75 x 3.5 Inches; Fits in a US Single Gang Box
    Downlink Ports 1x IEEE 802.3af 10/100/1000 Mbps Port
    Input Voltage Range 44-56 volts through Uplink Port
    LED Indicator Blue LED Status Indicator
    Max Power for Kit 25 watts total
    Mount Type In-wall
    Operating Humidity 5% to 90%
    Operating Temperature Range -10 – 45C
    PoE Method IEEE 802.3at/PoE+ (Uplink) / IEEE 802.3af LAN
    PoE Mode/Pinout Mode A (-1,2 +3,6)/Mode B (+4,5 -7,8)
    PoE Standard IEEE 802.3at and IEEE 802.3af
    PoE Standards Supported IEEE 802.3at PoE

    If you find this learning center helpful, like and subscribe on your social channels to learn when we post new guides!

    AT-USBC-JB and AF-USBC-JB

    AT-USBC-JB and AF-USBC-JB

    AT-USBC-JB, and AF-USBC-JB The In-wall PoE Converter for all Tablet Devices <13″

    Welcome to the PoE Texas Manual for the patented AT-USBC-JB designed for all tablet devices including Microsoft Surface, Apple iPad (USB-C and Lightning), Samsung Tab, and Amazon Fire that gives you wired Power and Data Power for your USB Type C devices!  It is also rated at a maximum output of 25W while the AF-USBC-JB is rated at a maximum output 15W and only has a PoE output.

    The purpose of the manual is to help you quickly and effectively navigate the installation and functions of your new Power Over Ethernet Converter.

    Our goal is to make our products as intuitive and simple to use as possible, so we value your feedback and questions directly to us at service@poetexas.com.  Phone +1-512-479-0317.

    Or you’re always welcome to leave questions or comments on our product page: AF-USBC-JB, AT-USBC-JB

    What’s Inside

    PARTS LIST:

    • 1 X POE+ Converter

    with optional:

    • 1 X USB-C to USB-C (right angle)

    or

    • 1 X USB-C to Lightning (right angle)

    The AT-USBC-JB can include a range of short, medium, or long cables provided by PoE Texas.  It is also compatible with most USB-C cables.

    Note: Apple’s USB-C to lightning cable will function with this device to deliver power, however, that particular cable is NOT designed to deliver power and wired data simultaneously.  For that purpose, we’ve designed our USB-C to Lightning Cable.


    PARTS LIST:

    • 1 X POE+ Converter

    with optional:

    • 1 X USB-C to USB-C (right angle)

    or

    • 1 X USB-C to Lightning (right angle)

    The AF-USBC-JB can include a range of short, medium, or long cables provided by PoE Texas.  It is also compatible with most USB-C cables.

    Note: Apple’s USB-C to lightning cable will function with this device to deliver power, however, that particular cable is NOT designed to deliver power and wired data simultaneously.  For that purpose, we’ve designed our USB-C to Lightning Cable.


    GENERAL INSTALLATION


    Your new PoE converter is designed to be simple to install and set up.  It is small and light enough to leave “inline” with your network cable and designed to fit inside a US single gang wall box or 60 mm deep EU round wall box.

    Once it is in place, simply follow these steps in order:

    1 – Plug the RJ-45 end into an IEEE 802.3at PoE (POE+) or 48-56 volt passive Power Sourcing Equipment (PSE) with a data source

    2 – Ensure the device you’re connecting to is on and logged in

    3 – Plug the USB-C connector into the device using the port you prefer

    In order to keep this device as compact as possible, the USB-C ports do share the Power Delivery (PD) communication pins.  If your device turns the power and data on/off rapidly after connecting it, unplug the USB-C cable at the AT-USBC-JB connector, rotate it 180 degrees and reconnect it.

    Option 2 – USB-C Power Delivery + USB 2.0 Data – Ideal for iPads (lightning or USB-C), Surface Go, Samsung Tab, or Google Pixel Phones

    The converter will automatically set up the network connection with your device and begin charging.  To confirm that, go to the General settings tab or look for the <…> symbol next to Ethernet.

    CONFIGURATION

    Configuring Your Cisco Enterprise POE Switch for 2 Event PoE Classification

    Yeah, I know that’s a mouthful.  Here’s the simple translation.  Cisco enterprise switches including the 9400 and 9300 models, which is a lot of them, come with a default setting that makes them less compatible PoE+ devices like the GAT-USBC-PD.   You’ll know the setting isn’t right because our device won’t power on correctly, and your device won’t charge.  How frustrating!

    It’s a simple enough fix.  You simply need to configure the ports that will power the GAT-USBC-PD to have 2 event classification.  You can find the Cisco documentation on how to do that here: CONFIGURE MY SWITCH

    Or here are the steps you take after you’ve logged into the terminal. 

    Switch> enable
    Switch# configure terminal
    Switch(config)# interface gigabitethernet2/0/1

    Switch(config-if)# power inline port 2-event
    Switch(config-if)# end

    You can still set up your iPad to not automatically lock on a timer.  When the screen locks if you would like the screen always on.

    • Go to the Settings icon on your iPad
    • Select Display & Brightness
    • Select Auto Lock
    • Set the limit to Never


    The splitter will auto-configure the IP settings to default as soon as you connect it up including Dynamic IP addressing.

    1. Navigate to General Settings, then you’ll see a symbol for the LAN <…>
    2. Select this and you’ll see the option for PoE Texas LAN, select it

    You’ll see your IPV4 IP address information.  If it shows “Automatic”, that means your getting a dynamically assigned IP address.

    If you’d like to reconfigure the IP address, DNS, and HTTP Proxy settings, you can do that by selecting these options.  

    The most used option will be fixing your IP address by selecting the “Automatic” button.

    For the other networks settings, we’d recommend talking to a service provider or give us a call: 512-479-0317 or service@poetexas.com.

    Best Practices for iOS Updates

    Despite Apple’s excellent reputation for ensuring backward compatibility with their iPads and iPhones, practical experience with a recent iOS update has revealed that even they can miss things which can temporarily lead to disruption of service for your device.   If your device must be reliable 24/7, we recommend these following best practices:

    • Go to Settings -> General -> Software Updates -> Automatic Updates
    • Deselect “Install iPadOS Updates”
    • Before choosing to install the next update, please check into our iOS Compatibility Table to check whether we have finished testing the performance of an new iPadOS version

    iOS Compatibility Table

    • Finally, to get emailed live updates on iOS compatibility, subscribe to our mailing list for iOS compatibility

    Technical Specifications

    Product Specifications AT-USBC-JB

    Adapters included See Dropdown Options for USB-C and Lightning Cable Options
    Cable connector length Various
    Cable connectors USBC-USBC Right Angle Cable
    Connector Types USB-C Power + Data (Power Delivery) / USB-C Fast Charging Only
    Data + PoE Ports 1 (Input) / 1 (Output)
    Data Rate 10/100 Mbps
    Data Standard USB 2.0 (Output)
    Dimensions 2.25×1.75×1.25 in
    Input Voltage Range 44-57v PoE
    Max Power for Kit 25 Watts / USBC negotiations (5V2.6A, 9V1.78A, 12V1.34A,15V1.37A, 20V1.15A)
    Mount Type Junction Box Receptacle
    Operating Humidity 10 – 90%
    Operating Temperature Range -10 to 40℃
    Output Voltage USB-C (5V2.6A, 9V1.78A, 12V1.34A,15V1.37A, 20V1.15A)
    PoE Method IEEE 802.3at; PoE+
    PoE Mode/Pinout Mode A/B
    PoE Standard IEEE 802.3at
    Power Input On Power Only Port – For devices drawing < 15 watts – Lenovo M10, MicroUSB devices, iPad 10.2 or Mini
    Storage Temperature -30 to 70℃
    Weight 1.75 oz.

    Product Specifications AF-USBC-JB

    Adapters included See Dropdown Options for USB-C and Lightning Cable Options
    Cable connector length Various
    Cable connectors USBC-USBC Right Angle Cable
    Connector Types USB-C Power + Data (Power Delivery)
    Data + PoE Ports 1 (Input) / 1 (Output)
    Data Rate 10/100 Mbps
    Data Standard USB 2.0 (Output)
    Dimensions 2.25×1.75×1.25 in
    Input Voltage Range 44-57v PoE
    Max Power for Kit 15 Watts / USBC negotiations (5V2A)
    Mount Type Junction Box Receptacle
    Operating Humidity 10 – 90%
    Operating Temperature Range -10 to 40℃
    Output Voltage USB-C (5V2A)
    PoE Method IEEE 802.3af; PoE
    PoE Mode/Pinout Mode A/B
    PoE Standard IEEE 802.3af
    Power Input
    Storage Temperature -30 to 70℃
    Weight 1.75 oz.

    If you find this learning center helpful, like and subscribe on your social channels to learn when we post new guides!

    GATS-10-8-51v120w

    GATS-10-8-51v120w

    Welcome to the PoE Texas Manual for the GATS-10-8-51V120W!

    The purpose of the manual is to help you quickly and effectively navigate the installation and functions of your new GATS-10-8-51V120W

    Our goal is to make our products as intuitive and simple to use as possible, so we value your feedback and questions directly to us at service@poetexas.com.  Phone +1-512-479-0317.

    Or you’re always welcome to leave questions or comments on our product pages: GATS-10-8-51v120w

    What’s Inside

    PARTS LIST:GATS-10-8-51V120W

    • 1 X PoE Switch
    • 1 X AC Cable
    • 1 X Manual

    You have everything you need to get your switch up and operating.  Let’s get started.


    GENERAL INSTALLATION


    To deploy your new PoE+ or IEEE 802.3at switch, you really only need three key things:

    1. AC power – 120 VAC 60 Hz or 220 VAC 50 Hz – 500 watts
    2. Gigabit Uplink Data on the RJ45 port
    3. Space: 8 3/4″ wide by 6 1/2″ long desk or wall space

    That’s it!  It’s designed to be a simply, cost effective PoE+ powered switch you can implement quickly.  You don’t need configuration cables, software downloads, apps, or certifications to use it!

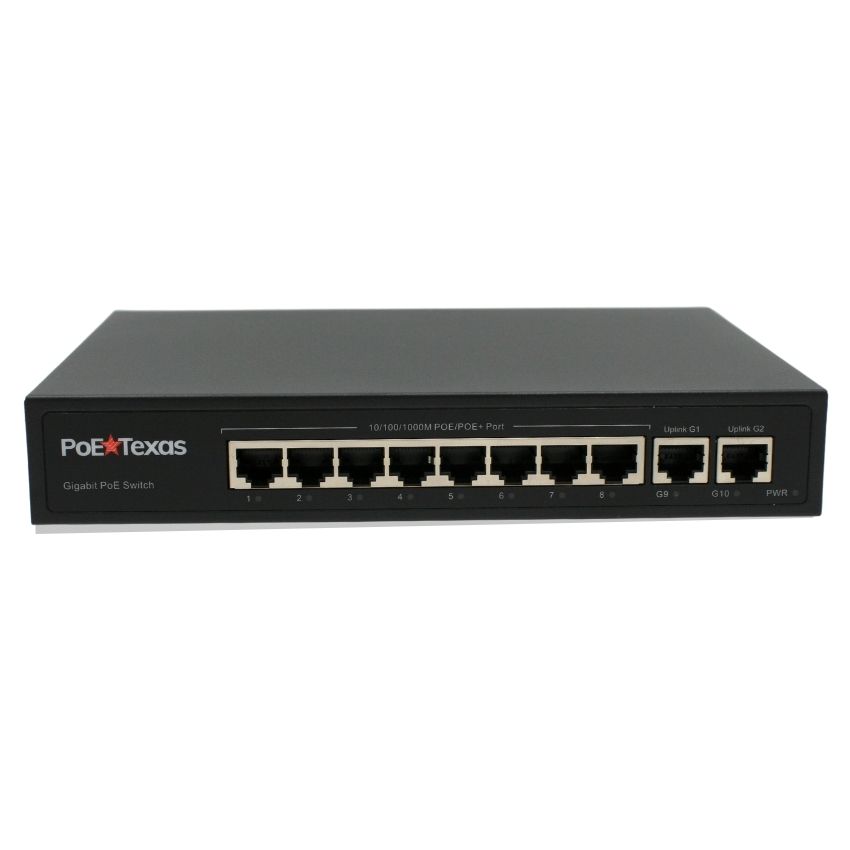
     Your switch has eight Gigabit PoE ports, two Gigabit data only ports, and LED indicator lights.  Not a lot to worry about here.  Let’s show you how it goes together.

    Put it together:

    DESK MOUNT:

    If you’re going to set this on a desk or a shelf, you simply place the switch into the location where you need it close enough to the outlet and network connection to your router or switch.

    Now you can plug it in using the included AC cable to power it up.  If you’re grounding your network*, you can use the earthing lug on the back of the switch.*  You might be tempted to overground your network.  Only ground your network in one location and ground it well.  Adding more than one grounding point could actually introduce noise to your network.

    Let’s power this thing on and configure it!

    CONFIGURATION

    Okay, you’re done configuring.  The switch will work right out of the box.

      LED LIGHTS: All the fun blinky lights!

      What you really want to check for is that the LNK/ACT light is blinking properly.  The LED should blink green indicating communication is happening with your device.

      WIRING

      Technical Specifications

      Product Specifications

      AC Plug Connector Type C14
      Adapters included Yes
      Cable connector length 3 ft
      Certifications CE, FCC, RoHS
      Data + PoE Ports 8
      Data Ports 2 Gigabit
      Data Rate Gigabit
      Dimensions 8.74″ x 6.5″ x 1.325″ in.
      Input Voltage Range 120 / 220 VAC
      LEDs Per Port 1 – PoE, Activity
      Max Power for Kit 120 watts
      Mount Type Desk
      Operating Humidity 10% to 90%
      Operating Temperature Range -20 – 50 C
      Output Voltage 51 volts
      PoE Method IEEE 802.3af; IEEE 802.3at
      PoE Mode/Pinout Mode A (-1,2 +3,6)
      PoE Standards Supported IEEE802.3, IEEE802.3u, IEEE802.3ab, IEEE802.3z, IEEE802.3az, IEEE802.3x
      IEEE802.3af, IEEE802.3at
      Storage Temperature -40-80 C

      If you find this learning center helpful, like and subscribe on your social channels to learn when we post new guides!

      GBTS-28-24-M

      GBTS-28-24-M

      Welcome to the PoE Texas Manual for the GBTS-28-24-M!

      The purpose of the manual is to help you quickly and effectively navigate the installation and functions of your new 24 port IEEE 802.3bt PoE switch designed for Intelligent Lighting and Automation

      Our goal is to make our products as intuitive and simple to use as possible.  We value your feedback and questions.  You can reach us directly at service@poetexas.com and +1-512-479-0317.

      Or you’re always welcome to leave questions or comments on our product pages: GBTS-28-24-M

      Note: Installation and servicing should be performed by qualified personnel.

      IMPORTANT SAFEGUARDS
      1. READ AND FOLLOW ALL SAFETY INSTRUCTIONS.  SAVE THESE INSTRUCTIONS.
      2. Do not use outdoors.
      3. Do not let power supply cords touch hot surfaces.
      4. Do not mount near gas or electric heaters.
      5. The grounding screw is for signal integrity and not for branch safety circuit grounding.
      6. Equipment should be mounted in locations, such as Intermediate Distribution Frames (IDF’s), behind locked doors.
      7. The use of equipment including interconnecting wiring not recommended by the manufacturer may cause an unsafe condition.
      8. Do not use this equipment for other than inteded use.

      SAVE THESE INSTRUCTIONS.

      What’s Inside

      PARTS LIST:GBTS-28-24-M

      • 1 X PoE Switch
      • 1 X Rack Mount Kit – Does NOT include the rack nuts and bolts!

      NOTE: The switch includes the screws for the rack wings, but it does not include the rack mounting nuts or screws.  So, you’ll want to grab some of those.

      You will want to have patch cables and potential some ferrule connectors for the power cables on hand if you’re not using the cables supplied with our PS-53v3000w power rectifier.

      You have everything you need to get your switch up and operating.  Let’s get started.


      GENERAL INSTALLATION


      To deploy your new IEEE 802.3bt DC powered switch, you really only need three key things:

      1. DC power – 42-58 Volts DC, though we recommend 53 volts or higher for Lighting and Automation projects.
      2. Gigabit Uplink Data on the RJ45 port or Small Form-Factor Pluggable Fibers slot
      3. Space:
      • 1 unit of 19″ rack space
      • 17 1/2″ wide by 9 1/2″ long desk space

      * Optional: If you’re rack mounting it, you do need nuts and bolts to mount it on the rack.

      Key note:

      • Per UL/IEC 62368-1 Clause F.4, this equipment is intended for use only in a restricted access area.

      That’s it!  Let’s get it mounted, then discuss how to configure it.  

      Put it together:

      RACK MOUNTING:

      If you plan to mount this into a rack, simply use the small screws to attach the rack mount wings.  You’ll need a small philips head screwdriver for this.

       The kit does not come with the hardware to mount it to the rack, so don’t forget to pick those up.

      About the Power Supply

      The GBTS-28-24-M is designed to take 48-58 volt DC power.  You’ll notice there are two input power points on the back.  

      The switch operates at maximum power output when both terminals are connected to the power supply.

      These push-in terminal sockets have a 22.5 amp limit and are rated for 10 AWG wire.  We recommend crimp on ferrules to make inserting and removing the cable easier.

      The PS-53v3000w power supply designed to operate with this switch comes with interconnecting cables.  You can use 1 x set of 12 gauge wire to power up to 1080 watts.  As you go up above 1080 watts in total power draw, you will need to use the second power port or V2. 

      If you have specific cable needs beyond the included interconnecting cables, you can speak to PoE Texas about your cable needs for your project.

      HOW DO I KNOW HOW BIG MY POWER SUPPLY SHOULD BE?

      You can use our PoE calculator to quickly calculate your expected load on the PoE injector.

      Check it out here:

      WIRING DIAGRAMS FOR

      GBTS-28-24-M AND PS-53V3000W POWER RECTIFIER

      Download Drawings


      CONFIGURATION

      The GBTS-28-24-M will function perfectly as a basic IEEE 802.3bt switch for PoE lighting and automation without any configuring right out of the box.  For most basic networks, you do not need to configure the switch to operate.  It will power on, negotiate the 4 Pair PoE for automation, and forward on the right network traffic for a basic configuration.

      However, if you need to configure the switch, you will need a fundamental understanding of networking to do more than a few key management items.  We won’t try to show you how to do all the possible Layer 2 configurations in this manual.  Please contact us if you’d like additional information on configuring Layer 2 settings.

      We will cover some important features you can control such as turning on a PoE watchdog, monitoring the ports, and setting your IP address to match your network.

        CONFIGURATION GUIDE

        Generally, the device comes pre-configured for optimal performance, however, PoE Texas recommends these settings be adjusted:

        • Password – change the password from the default setting
        • Set date/time
        • Name the device per the project nomenclature for identification
        • Optional: Configure VLANs

          Configuration Guide for Emergency Lighting (UL924)

          (PENDING) This PoE switch can be configured for service as a power distribution device for emergency lighting in compliance with UL924.  In order to configure this device for service as an emergency lighting power distribution device, you need to configure it with these parameters in mind:

          • The emergency lightin system must includea UPS backup sized sufficiently so the PoE switch remains powered on during the transfer time from normal to emergency power

          • The PoE switch does not locally store emergency power, so a UL924 rated power transfer and storage device or UL rated back up generator must be provided for 90 minutes of emergency lighting power

          • When used in a UL924 configuration, this PoE switch does not do load shedding so all loads, or lights, connected to that switch must be emergency lights

          • This PoE switch acts simply as a power distribution panel that accepts power from an upstream UL924 transfer device and power storage system and distributes it to downstream lights

          For detailed wiring and configuration information for Emergency Lighting, please see the diagrams below.


          Configuration Guide Option 1

          Configuration Guide Option 2

          Configuration Guide for Power Supply PS-53V3000W

          Generally, the device comes pre-configured for optimal performance, however, PoE Texas recommends these settings be adjusted:

          • IP address – the device does not allow for DHCP clients, so a subnet or VLAN should be defined in advance
          • Password – change the password from the default setting
          • Set the date and time
          • Name the device per the project nomenclature for identification
          • Enable/disable batteries as necessary – enable batteries only if one is connected
          • Install and configure temperature probes


          Web Management

          CONNECTING TO THE CONSOLE

          The GBTS-28-24-M has a web-based management interface that can be accessed through any of the network ports on the switch.  Before you integrate it into your network, you will need to set the IP address to match your local network settings.

          To start the configuration you need directly connect a network port to a computer.  If you don’t have an ethernet port on your laptop, this works just fine with an ethernet to USB adapter.

          Then power on the injector using any 48-56 volt power supply.  The settings will remain in the device even if you power it off and power it on again.

          Now comes the techiest part of the process.  You will need to disconnect your computer from wifi and the internet.  I know this feels very dangerous, but it’s only for a moment.

          We show the instructions in the video to the left for a Windows computer.  If you need help doing this on a MAC, simply go to YouTube and search on setting an fixed IP address for a MAC.  Then use the IP address information I give below.

          In Windows, navigate to your Network and Sharing Center.  If you don’t know how to get there, simply click on the Window button on the bottom left and type “Network and Sharing Center”.

          When it comes up, you should see an ethernet connection.  If not, double check 1) you’re connected to the switch through an ethernet port, and 2) the switch is powered on.  Click on the ethernet connection.  It will bring up a dialog box.Click “Properties” on the bottom left.

          In the next dialog box, look in the middle for “Internet Protocol Version 4”.  Click on it, then click “Properties” in the bottom right.

          Fill out the fields just like this.

          Click: User the following IP address

          IP Address: 192.168.0.10

          Subnet Mask: Sets itself

          Default Gateway: 192.168.0.5


          Preferred DNS Server: 8.8.8.8

          Alternate DNS Server: 4.2.2.2

          Hit Okay to close this dialog, then Okay one more time.

          I’ve tried not hitting okay the second time, and I couldn’t get it to connect.  So, make sure it hit okay to close out the two dialogs.

          Finally, open a web browser and type 192.168.0.1 in the URL Bar.

          The default username is: admin

          The default password is: admin

          You’re in!

          Configuration Settings

          As mentioned above, we’re not going to try to show you how to use all of the functions of a Layer 2 switch, in good part because most of the functions do not really apply to Automation and Lighting.  The video configuration guide shows you how to:

          • Quickly see the status of the ports
          • Log on to the switch
          • Change the basic configurations in terms of time, location, etc.
          • Add or change users
          • Enable/Disable communication to the switch
          • Set the time clock to a server
          • Create a backup configuration file
          • Change the basic IP address of the switch
          • Manage the PoE including setting the total power budget
          • Finally, set a PoE port watchdog to reboot any ports that lose communication

          Heat Load Calculator

          The GBTS-28-24-M does put off enough heat when under load that it’s important to consider how you will deal with the heat.  The key considerations are:

          • The GBTS-28-24-M operates well up to 40 C or 104 F in local ambient conditions
          • Local ambient conditions mean the space where the switch will be located
          • While an office space may be at 75 F, a fully enclosed rack without ventilation can easily go above 110 F
          • Ideally the GBTS-28-24-M is installed in the rack with at least 1u space between it and the PS-53V3000W
          • Racks should either be open in the back or have good, reliable forced ventilation to move around around and out of the cabinet
          • The room outside, typically an IDF or MDF, the rack or cabinet should have local temperature control through a thermostat and air handling unit
          • See the Heat Load Calculator to see how to size any air handling or air conditioning requirements

          To estimate the heat load of the PS-53v3000w power supply, visit that Heat Load Calculator.

          Management of heat for your equipment is an essential element to the life expectancy of your equipment.  Overheating when using these switches at full load is a possibility.  Our best practices for a rack configuration are:

          1. Provide at least 1u space between switches to allow for air flow.
          2. Include rack mounted vent fans to provide for good air circulation.  We have often seen this brand used: https://rackfans.com/
          3. Do not mount the equipment in enclosed racks that have poor air circulation.

          Technical Specifications

          Product Specifications

          Data + PoE Ports 24
          Data Ports 4 Ports Gigabit + 4 SFP Gigabit Ports
          Data Rate Gigabit
          Data Standard IEEE802.3,IEEE802.3u,IEEE802.3ab, IEEE802.3Z, IEEE802.3X, IEEE 802.3ad, IEEE 802.3q,
          IEEE 802.3q/p, IEEE802.1w, IEEE 802.1D, IEEE 802.1s
          DC connector Push In Connector
          DC Power Input 2,160 Watts
          Dimensions Switch: 19 x 3.5 x 1.5 inches / Rectifier: 19 x 13.25 x 1.75 inches
          Display Type Web Management
          Frame Forward Rate 40.32 Mbps
          Input voltage 55 Volts DC
          Input Voltage Range 48 – 55 Volts DC
          LEDs Per Port Link/Act (Green), PoE (Orange), Power (Red)
          Management Port Yes
          Max Power for Kit 2160 Watts
          Max Voltage 58 Volts
          Max. Amps Per Port 90 watts
          Mount Type Rack (1U switch + 1U Rectifier)
          Operating Humidity 5% to 95% (non-condensing)
          Operating Temperature Range -10-55 C
          PoE Configurable Per Port Yes
          PoE Mode/Pinout Mode A / B
          PoE Standard IEEE 802.3bt Type 3;
          4 Pair PoE;
          Mode A / B negotiation
          PoE Standards Supported IEEE 802.3af/at/bt Type 3/bt Type4
          4 Pair PoE;
          Power Supplies Optional 55v 3000w Rectifier [GBT-24-M-56v3000w]
          Switching Capacity 128 G
          Weight Switch Only: 4.5 lbs; Switch + Power Supply: 17.75 lbs

          If you find this learning center helpful, like and subscribe on your social channels to learn when we post new guides!

          PoE Smart Mirror

          PoE Smart Mirror

          Chances are, if you’re at this page, you’ve seen at least one part of the PoE Smart Mirror project on YouTube. If you haven’t this might not make sense yet, so be sure to go back and watch the videos to see the mirror come together. Maria has been wanting to build this smart mirror for some time now and it was great to see the final product. We hope everyone enjoyed watching the process and liked how the mirror turned out. It might not be the most high-end option out there, but it was a great project that any new, or experienced hobbyist can tackle. If you want to learn more about the process, or see what specific steps we took, read through this page and maybe it’ll inspire you to build one for yourself!

          See how it all came together!

          Background

          Hi, ya’ll! Maria here to give some background about this project before we dive into specifics. Now that it’s complete, I can say that it was such a great project to take on. I was definitely nervous at first because I have never built a project like this, let alone built anything with coding involved. Thankfully I was able to recruit Jeremy who was excited about the process and became a huge help. The concept came about because we wanted to find a cool project to do for our YouTube channel using a Raspberry Pi. We wanted to show build/application options you can do with an R-Pi and have it POE powered using our GAF-PiHAT accessory. We had an old laptop screen at the office and thought it’d be great for a first video project concept. Seeing the mirror come together was so rewarding. It made the ups-and-downs of coding worth it. I’m excited to provide you with this guide for those who want to build one of their own.

          Materials and Tools You’ll Need

          Materials Used:

          • 2-Way Mirror
          • Pi Case
          • Raspberry Pi (we used a 3B+)
          • GAF-PiHAT (POE powered application)
          • Cat5e cable
          • 802.3af POE injector
          • GAT-12v25w PoE splitter
          • MircoSD Memory Card
          • LED strip lights
          • Mounting adhesive strips
          • Hobby Board/wooden planks
          • Upcycled laptop screen/Pi Screen
          • Software of choice
          • Black foam to block out negative space

          Tools:

          • Nails (wood glue is an option as well)
          • Zip ties
          • Screws
          • Nail gun
          • Saw and Sandpaper (used to make the wooden frame)
          • Scissors
          • Marker
          • Measuring tape

          Software:

          • Win32 or other imaging software
          • MagicMirror
          • Raspberry Pi OS (32-bit with Desktop worked for us)

          Part 1: The Build Process

          Step 1: Measure for your frame. Whether you’re using hobby board or wooden planks, it’s important to get your frame measurements correct since this is the base for the mirror. You’ll want to make sure it fits the screen size you’re using.

          Step 2. Cut. Once you’ve measured the dimensions needed for your frame, cut the pieces out and sand them down. This is where you can paint your frame, too. We went with a neutral, blonde finish.

          Step 3: Assemble. The three main pieces to assemble as the base for your frame are the rods (hidden underneath) to hold the screen in place, the outside cover piece, and the frame itself.

          Step 4: Mounting.  This is when we mounted the screen to the inner, hidden rods and find the right position for your screen. The right position for our build was right in the middle. Cut the foam to hide the excess space, and place it around the screen to create blackout effect.

          Step 5: Add your Mirror. Put the mirror in place and attach the ‘lid’ part of frame to hold it in place. The way ours was measured and cut, you could hear a physical ‘snap’ sound when the two pieces connected. We secured ours a step further with latches and screws.

          Step 6: Cable management. Time to add your connections. This is when we connected our Raspberry Pi, GAF-PiHAT, HDMI cable running to the screen console, and the LED lights. The LED lights were powered from an open USB port on the R-Pi and attached to the sides of the frame with the included adhesive strips.

          At this point your build should look like a regular mirror. The next steps will bring the smart mirror aspect into it as you begin to program the software.

          Part 2: The Programming Process

          Download Raspberry Pi OS, your smart mirror software of choice, and image/re-image your SD card. MagicMirror provided us with a set of commands for the basic configuration, but a small knowledge of basic terminal commands is definitely helpful in this process.

          Your Raspberry Pi is only the computer. The “brain” is going to be the SD card since that is where the operating system is downloaded. If you try to connect the blank SD card to the brand new Raspberry Pi, nothing will happen. This is why you have to download the Raspberry Pi OS. There are different versions to choose from so find the one that fits your application You will have to download the file and image your SD card. Once it’s imaged it will be able to run your operating system. Now you can move forward with downloading and installing the smart mirror software of choice. In our case, we used MagicMirror. This will be downloaded to your Raspberry Pi.

          Open the terminal and run shells commands to start the process of bringing the smart mirror to life. There are different versions of this MagicMirror software so your commands might be different. This is why I decided to not list the specific commands we used. You can find updated versions on MagicMirror.builders, or even google MagicMirror terminal commands.

          MagicMirror Software:

          https://magicmirror.builders/

          Follow the basic steps on the site to download and install the most updated version. At the time of our build it was Node.js

          https://docs.magicmirror.builders/getting-started/installation.html#manual-installation

          Modules:

          Once we had the basic commands set up, we were able to choose which MagicMirror modules to customize our mirror interface with.

          https://github.com/MichMich/MagicMirror/wiki/3rd-party-modules

          Module 1: Weather

          https://forum.magicmirror.builders/topic/12703/weather-forecast-and-current-weather-modules/3

          Module 2: MMM – Astrology

          https://github.com/cowboysdude/MMM-Astrology

          Module 3: Holidays

          This module is stock, so we just had to find and code our region — Austin, TX.

          Module 4: Compliments

          We decided to disable this module because of the default wording it uses. In the video, you’ll get an example of the compliments this stock module greets you with. Instead, we replaced it with a standard text module to say “Hello, world.”

          Module 5: Date/time

          This module was another stock feature. To make it accurate for our region, we simply had to set it to CST.

          Would You Like to Know More? We’re happy to discuss it with you.

          Drop Us a Line to Schedule a One-on-One Consultation

          success@poetexas.com
          512.479.0317

          Heckler Wall Mount Enclosure

          Heckler Wall Mount Enclosure

          iPad Wall Mount Plus PoE Power Kits

          Welcome to the PoE Texas Manual for the Heckler Design iPad Wall Mount Plus PoE Power!  You can now have a surface mounted iPad enclosure with a single cable and no holes in your wall!

          The purpose of the manual is to help you quickly and effectively navigate the installation and functions of your new iPad mount kit. 

          Our goal is to make our products as intuitive and simple to use as possible, so we value your feedback and questions directly to us at service@poetexas.com.  Phone +1-512-479-0317.

          Or you’re always welcome to leave questions or comments on our product page: H564-GAT-Kit, H564-POE-Kit, H565-GAT-Kit, H565-POE-Kit.

          What’s Inside

          H564 and H565 – POE-Kit

          PARTS LIST:

          • 1 X iPAD WALL MOUNT
          • 4 X WALL ANCHORS
          • 2 X TOOLS
          • 1 X POE INJECTOR (POE-1B)
          • 1 X 24 VOLT 12 WATT POWER SUPPLY (PS-24V12W)

          Additional tools and supplies you’ll want to make sure you have are:

           – Drill and 3/8″ drill bit

           – Category Cable wiring tools or some device to strip the shielding off the CAT cable at the tablet end

           – Laser or bubble level

           – Marker or pencil

           – Oh, and don’t forget your iPad!

            H564 and H565 – GAT-Kit

            PARTS LIST:

            • 1 X iPAD WALL MOUNT
            • 4 X WALL ANCHORS
            • 2 X TOOLS
            • 1 X POE CONVERTER (GAT-24V25W)


            Additional tools and supplies you’ll want to make sure you have are:

             – Drill and 3/8″ drill bit

             – Category Cable wiring tools or some device to strip the shielding off the CAT cable at the tablet end

             – Patch cable from the PoE Converter to the iPAD Wall Mount

             – Laser or bubble level

             – Marker or pencil

             – Oh, and don’t forget your iPad!

            General Installation

            The most important Power Over Ethernet feature you need to be aware of is that the iPAD Wall Mount requires 24 volt Passive PoE, a datacom industry standard, in order to fit the case.  We offer the mount kitted with either a 24 passive PoE injector you can install back in the IDF or server room, or a POE inline converter that transforms IEEE 802.3af or at into 24 volt passive PoE.

            You can find all of our compatible PoE devices here.

            Since you’re using 24 volt passive PoE, please connect the wires to the iPAD mount prior to plugging in the RJ-45 into the injector or converter.

            CONFIGURATION

            TROUBLESHOOTING

            The iPAD Wall Mount is designed to function right out of the box with all the parts necessary to do so.  However, if you are having an issue, here are a couple things to check:

            1 – Are you using a 24 volt passive PoE power source?  A Cisco or other IEEE 802.3af or at switch will not power on the mount.

            2 – Are the connectors on the iPad mount secure pressed down?  And when you gently tug on the wires to they come out by themselves?.

            3 – The wiring diagram is for a straight through cable with blue white/blue and brown white/brown connected to pins 4/5 and 7/8 respectively.  If your wire is connected up differently than this diagram, please contact us.


            You can also check out our warranty,  including the free optional extended warranty, and returns on these pages:

            WARRANTY AND RETURNS

            Technical Specifications

            Product Specifications

            Adapter length 3 ft AC Cable
            Adapters included GAT-Kit – PoE to 24 Volt Passive PoE Adapter POE-Kit – Passive PoE Injector
            Certifications CE, FCC, UL
            Data Rate N/A – Wireless Data Only
            Efficiency 90%
            Input Frequency Range POE-Kit: 50/60 Hz
            Input Voltage Range POE-Kit: 120-220 VAC
            Max Power for Kit 12 watts
            Mount Type Wall
            Operating Humidity 5% to 90%
            Operating Temperature Range -10 – 60C
            PoE Method POE-Kit: Passive PoE GAT-Kit: IEEE 802.3af and IEEE 802.3at
            PoE Mode/Pinout POE-Kit: Mode B (4/5 , 7/8) GAT-Kit: Mode A/B

            If you find this learning center helpful, like and subscribe on your social channels to learn when we post new guides!

            GAT Series Splitters

            GAT Series Splitters

            PoE+ IEEE 802.3at Splitters

            Welcome to the PoE Texas Manual for the GAT Line of PoE+ Splitters!

            The purpose of the manual is to help you quickly and effectively navigate the installation and functions of your new Power Over Ethernet Splitter.

            Our goal is to make our products as intuitive and simple to use as possible, so we value your feedback and questions directly to us at service@poetexas.com.  Phone +1-512-479-0317.

            Or you’re always welcome to leave questions or comments on our product pages: GAT-5v20w, GAT-12v25w, GAT-15v25w, GAT-19v25w, GAT-24v25w and GAT-50V30W.

            What’s Inside

            PARTS LIST: GAT-5v20w
            • 1 X POE SPLITTER

            These all come with a female 5.5 x 2.1 mm DC barrel connector.

              PARTS LIST: GAT-12v25w
              • 1 X POE SPLITTER
              PARTS LIST: GAT-15v25w
              • 1 X POE SPLITTER
              PARTS LIST: GAT-19v25w
              • 1 X POE SPLITTER
              PARTS LIST: GAT-24v25w

              1 X POE SPLITTER

              General Installation

              Your new PoE splitter is designed to be simple to install and set up.  It comes with mounting screw tabs for a #4 wood screw which allows you to mount it easily on plywood or on DIN rail brackets. 

              Once it is in place, simply plug the RJ-45 end into an IEEE 802.3at PoE or 48-56 volt passive Power Sourcing Equipment (PSE) with a data source, and the other end into your device such as a camera, tablet, or any compatible device. 

              That’s it.  You device should immediately start charging.

              CONFIGURATION

              Technical Specifications

              Product Specifications

              Adapters included See Variation Options
              Certifications RoHS, CE
              Data + PoE Ports 1 (Input)
              Data Ports 1 (Output)
              Data Rate 10/100/1000
              DC connector 5.5 x 2.1 mm DC Female
              Dimensions 4.5 x 2 x 1 in
              Efficiency 90%
              Input voltage 44 to 56 volts
              Max Current 4,000 mA
              Max Power for Kit 20 or 25 Watts
              Operating Humidity 10 -90% non condensing
              Operating Temperature Range 0 – 40C
              Output Voltage 5/12/15/19/24 volts
              PoE Mode/Pinout Mode A/B
              PoE Standard IEEE 802.3at
              Weight 3.0 oz

              If you find this learning center helpful, like and subscribe on your social channels to learn when we post new guides!

              POE Tester Gen2.5

              POE Tester Gen2.5

              Welcome to the PoE Texas Manual for the PoE Tester GEN 2.5!

              The purpose of the manual is to help you quickly and effectively navigate the installation and functions of your new Power Over Ethernet Tester Gen 2.5 – Can achieve up to IEEE 802.3bt Type 4 PoE.

              Our goal is to make our products as intuitive and simple to use as possible, so we value your feedback and questions directly to us at service@poetexas.com.  Phone +1-512-479-0317.

              Or you’re always welcome to leave questions or comments on our product page: POE Tester GEN 2.5

              What’s Inside

              PARTS LIST:
              • 1 X POE TESTER – 2.5 GENERATION
              • 1 X USER GUIDE
              • 1 X 5.5 X 2.1 DC JUMPER CABLE FOR POWER SUPPLY TESTING
              • OPTIONAL ACCESSORY: POE DETECTOR


              You have everything you need to get your switch up and operating.  Let’s get started.


              APPLICATIONS


              • Measure Power Over Ethernet on active data cables without interrupting data flow
              • Quickly detect and identify PoE type and Mode
              • Measure the power consumption and performance of any DC power supply
              • Activate any port on an IEEE 802.3af/at switch

              QUICK START GUIDE

              Testing PoE

              1. Connect a PoE switch or injector to the RJ45 port on the “Power In” side
              2. Add a PoE powered device to the RJ45 on the “Power Out” side
              3. The readings will automatically display on the screen.

              Testing DC Power Supplies

              1. Connect a DC power supply to the “DC Power In” to just measure voltage
              2. Use the jumper cable from “DC Power Out” to your device to measure the current draw as well

              NO BATTERIES REQUIRED

              SERIOUSLY, NEVER

              READING THE DISPLAY

              As the display scrolls left, you see in order: volts (V), amps (A), and watts (W)

              The display shows only voltage for PoE and DC power supplies if no powered device is connected.  It will “turn on” an IEEE 802.3aft or at PoE port when the “Simulate PoE device” setting is ON and no powered device connected.

              The display shows volts, amps, and watts for 802.3af, 802.3at, 802.3bt Typ3 4 Class 8, passive PoE, and DC power supplies when the tester is connected to a powered device.

              Mode A or Mode B indicates which wire pairs transmit the power.  See below.

              SIMULATE POE DEVICE

              IEEE 802.3af/at/bt Pass-through Mode 

              (“Simulate PoE Device” set to OFF)


              In this mode the tester will display volts, amps, and watts when connected to either an 802.3af/at switch and a powered device.  The display is inactive when no powered device is connected.

                IEEE 802.3af/at/bt Pass-through Mode 

                (“Simulate PoE Device” set to ON)

                In the 802.3af/at Simulate Mode, the tester becomes a PoE Powered Device and the display will show the volts output from the Power Sourcing Equipment like a switch or midspan even if no PoE device is connected. 

                You can still connect a PoE device to measure the amps and watts passed to the device.

                  Technical Specifications

                  Data Rate 10/100/1000
                  DC Power Input 2.1 mm DC barrel
                  Dimensions 6.5x6x2 cm
                  Display Range (DC input) 3.5 to 57 volts, 0 to 5 Amps
                  Display Range (PoE input) 12 to 57 volts, 0 to 1500 mA
                  Display Type LCD
                  Operating Humidity 5% to 90%
                  Operating Temperature Range -10° to 60°C
                  PoE Method Passive (Simulated 802.3af)
                  PoE Standard 802.3af/at
                  PoE Standards Supported Passive, 802.3af, 802.3at, 802.3bt
                  Power Input 2.1mm DC
                  Weight 0.06 kg

                  Midspan and Endspan Compatible

                  Works with PoE Switches and Injectors as well as tradition DC power supplies


                  Polarity:

                  In Mode A, test both polarity types:

                  T568A: 1,2 (-) and 3,6 (+)

                  T568B: 1,2 (+) and 3,6 (1)


                  In Mode B, tests polarity 4,5 (+) and 7,8 (-)

                  If the device uses reverse polarity for Mode B (Cambium devices), then the tester will not measure the power.   To test reverse polarity Mode B, use a pair of WS-CS-RJ45 reversing cables  available at www.poetexas.com.


                  If you find this learning center helpful, like and subscribe on your social channels to learn when we post new guides!

                  GAT-USBC, AT-USBC-REV3

                  GAT-USBC, AT-USBC-REV3

                  GAT-USBC and AT-USBC-REV3

                  Welcome to the PoE Texas Manual for the GAT-USBC and AT-USBC-REV3 that gives you USB Type C Power Delivery and Gigabit data over a single network cable for iPad Pro’s and other USB-C tablets!

                  The purpose of the manual is to help you quickly and effectively navigate the installation and functions of your new Power Over Ethernet kit.

                  Our goal is to make our products as intuitive and simple to use as possible, so we value your feedback and questions directly to us at service@poetexas.com.  Phone +1-512-479-0317.

                  Or you’re always welcome to leave questions or comments on our product page: GAT-USBC and AT-USBC-REV3

                  What’s Inside

                  PARTS LIST:

                  • 1 X GAT-USBC

                  The things you want to make sure you get are:

                   – USB Type C male to male cables in the configuration you need

                   – Screws for mounting the devices

                   – Home-run data cable

                  If you’re looking for a Power and Data over USB Type C solution, check out our GAT-USBC-PD.  

                    PARTS LIST:

                    • 1 X AT-USBC-REV3

                    The things you want to make sure you get are:

                    – USB Type C male to male cables in the configuration you need

                    – Home-run data cable

                    – Keystone brackets if mounting.

                    If you’re looking for a Power and Data over USB Type C solution, check out our GAT-USBC-PD-V3.

                      General Installation

                      Yes, this splitter will work with a normal PoE (IEEE 802.3af) switch or midspan for 12 watts of power, but to get the full PoE power budget you need a PoE+ (IEEE 802.3at).

                      If you have a PoE switch and want the full PoE+ power, PoE Texas offers midspans that can add PoE+ to any PoE switch.  You can find the midspans here.  Do contact us at poe.shifu@poetexas.com or 512-479-0317 if you’d like help selecting a product.

                      Knowing a little about USB Type C helps understand how to get the most out of your device.  USB Type C Power Delivery (PD)  means the device your powering like a tablet or phone sends a message to the power supply, our GAT-USBC, to find out what kind of power it can supply.  Normally, devices, including the GAT-USBC, advertise that they can do 5, 9, 12, 15, and 20 volts.  Then your USB-C device decides what it likes best and requests that profile.  Then power starts to flow.  However, if the two devices cannot agree on a profile, it defaults to 5 volts.  If the device being powered doesn’t like 5 volts, well, it just doesn’t charge.

                      How Do I Know What Profiles I Need?

                      The easiest way to find at least some of the profiles of your device is to look at the power supply that came with it.  On the Output side you’ll find the profile of your device.  Compare that to the profiles on the GAT-USBC to confirm they match.

                      WARNING: Samsung devices have a USBC connector, but they use QuickCharge 2.0, not PD.  This model will only charge at the 5 volt 3 amp profile.

                      The installation is simple and only requires a few minutes to set up with now specialty tools.

                      • Make the home run cable from the main switch: PoE or PoE+ (preferred) in the server room or IDF. 
                      • Run the home run cable to the end location where you want your device.  
                      • Connect the GAT-USBC to the CAT Cable.
                      • Connect the USBC cable from the GAT-USBC to your end device.
                      • The green and orange lights will turn on and your device powers up.

                      CONFIGURATION

                      Technical Specifications – GAT-USBC

                      Product Specifications

                      Connector Types USB Type C
                      Data Rate 10/100/1000
                      Dimensions 4.5 x 2 x 1 in
                      Efficiency 90%
                      Input Voltage Range 44-56 volts (IEEE 802.3at compliant)
                      LEDs Per Port Green (POE) / Yellow (USB-C)
                      Max Power for Kit 25 watts
                      Mount Type Wall or DIN rail clips
                      Operating Humidity 5% to 90%
                      Operating Temperature Range -10 – 60C
                      Output Voltage Output Current: 3A/5v, 2.4A/9v, 2A/12v, 1.7A/15v, 1.3A/20v; REV 2 Output: 5v/3A; 9v,2.4A; 12v,2A; 15V,1.5A; 20V,1.3A
                      PoE Method IEEE 802.3at / PoE+ / Passive 30 watt
                      PoE Mode/Pinout Mode A/B
                      PoE Standard IEEE 802.3at
                      Power Input 25.5 watts
                      Weight 3 oz

                      Technical Specifications – AT-USBC-REV3

                      Product Specifications

                      Connector Types USB Type C
                      Data Rate None
                      Dimensions 3 x 2.875 x .875 in
                      Efficiency 90%
                      Input Voltage Range 44-56 volts (IEEE 802.3at compliant)
                      LEDs Per Port Green (POE) / Yellow (USB-C)
                      Max Power for Kit 25 watts
                      Mount Type Gang Box or Keystone Mounting Brackets
                      Operating Humidity 5% to 90%
                      Operating Temperature Range -10 – 60C
                      Output Voltage Output Current: 3A/5v, 2A/9v, 1.5A/12v, 1.35A/15v, 1.25A/20v
                      PoE Method IEEE 802.3at / PoE+ / Passive 30 watt
                      PoE Mode/Pinout Mode A/B
                      PoE Standard IEEE 802.3at
                      Power Input 25.5 watts
                      Weight 3 oz

                      If you find this learning center helpful, like and subscribe on your social channels to learn when we post new guides!

                      GBT-12v60w

                      GBT-12v60w

                      Welcome to the PoE Texas Manual for the GBT-12v60w POE ++ (802.3BT) Splitter

                      The purpose of the manual is to help you quickly and effectively navigate the installation and functions of your new Power Over Ethernet Splitter.  

                      Our goal is to make our products as intuitive and simple to use as possible, so we value your feedback and questions directly to us at service@poetexas.com.  Phone +1-512-479-0317.

                      Or you’re always welcome to leave questions or comments on our product page:

                      GBT-12V60W

                      What’s Inside

                      GBT-12v60w

                      PARTS LIST:

                      • 1 X 802.3bt (POE++) to 12 volt 60 watt DC splitter
                      • 2x side mount tabs

                      Additional items you’ll need not included:

                      1 – Screws for mounting

                      2 – 802.3 bt Compatible POE Switch or Midspan Injector

                      3 – Home run cable from POE Switch or Injector to GBT-12V60W 

                      4- DC wire to connect to 12 volt device.

                      • Looking for a solution? Try our DC-21MM DC wire lead to a 2.1mm x 5.5mm DC connector (fits most 12 volt devices)

                      General Installation

                      The GBT-12v60w is a PoE  Splitter/ Converter. The purpose send 40-57 volts POE ++ to the input and allow GBT-12V60W to convert this PoE power to 12 volts 60 watts for a DC powered device, with Gigabit data available on the LAN port.

                       This unit must be used with 802.3bt compliant PoE switch or injector, capable of providing at least 60 watts on the PoE output (4 pair PoE). Designed for Indoor use only.


                      1. Use a patch cable to run from your powering equipment to this wall mounted splitter and simply mount it near the 12 volt DC device your powering.
                      2. Plug your PoE cable to the ‘PoE’ port on GBT-12v60w.
                      3. Using your existing DC cable (or cable purchased from us –DC-21MM) hard wire into GBT-12v60w —[Red is (+) on the left, White is ground on the middle, and Black is (-)on the right] see below.
                      4. Use a patch cable to connect from LAN on the splitter to LAN on your powered device.

                      CONFIGURATION

                      There is no configuration necessary with this device.  Simply plug it in.

                      The green LED indicates power on.  If the light turns blue, it indicates the device is drawing more than 60 watts of power.   

                      If the green light begins to blink at any time, it could indicate there is a short in the circuit or a compatibility issue.

                      STEPS TO TROUBLESHOOT:

                      1 – At the injector, disconnect the PoE port from your device.  Use a PoE Tester to confirm the device is able to power on using a short jumper cable.

                      2 – At the other end of the PoE cable to your device, disconnect the device and use the PoE Tester to confirm it is able to negotiate PoE.

                      3 – Connect the PoE Tester in line with the end device to monitor power consumption.

                       Please contact us at service@poetexas.com (512-479-0317) if you have any questions or need help troubleshooting.

                      Technical Specifications

                      GBT-12v60w

                      Connector Types RJ45 x 2 (PoE In / Data Out); Phoenix Connector
                      Data + PoE Ports 1 (Input)
                      Data Ports 1 (Output)
                      Data Rate 10/100/1000
                      Dimensions 9.6 X 6.1 X 2.25 Inches
                      Input Voltage Range 40-57v DC
                      IP Rating IP20
                      LEDs Per Port 2 (Power and Active Indicators)
                      Max Amps Per Kit 4.5 Amps
                      Max Power for Kit 60W
                      Max Voltage 12V
                      Mount Type Wall Mount
                      Operating Humidity 10% to 90% Non-Condensing
                      Operating Temperature Range 0 to 40°C
                      Output Voltage 12 volts
                      PoE Method Active
                      PoE Mode/Pinout Mode A (-1,2 +3,6) Mode B (+4,5 -7,8)
                      PoE Standard IEEE 802.3bt
                      Power Input 40-57v PoE
                      Storage Temperature -20C to 70C
                      UPC 696305323113
                      Weight 1.12 lb.

                      If you find this learning center helpful, like and subscribe on your social channels to learn when we post new guides!

                      PoE Specifier’s Guide

                      PoE Specifier’s Guide

                      Power Over Ethernet Specifier's Guide

                      A Rapid Reference Guide for Technical Sales and Design Professionals

                      How to Use This Planning Guide

                      You can follow along online using this guide to gather and process the information you need to specify your PoE application.  Or you can download our handy PDF guide that follows the same process.  Our goal is to get your PoE identified and specified as quickly and conveniently as possible.

                      PROJECT TYPE

                      Select the Type of Project You Have

                      I need to install . . . 

                      • Non-PoE Device like a Tablet, Signage, or Computer Display
                      • Automated Lighting or Blinds
                      • IP Cameras
                      • IP Phones
                      • Wifi Access Points
                      • Other

                      Next, and this is the HARDEST PART, pick the product or device you’d like to use.  So many options!  Then, once you know, collect the datasheet for the product.  Trust us, you’ll want it.

                      Reading the Datasheets

                      Once you have your trusty datasheet handy, we’ve highlighted the specs your looking for in these two examples:

                      1. Data rate
                      2. Input port type – you do need RJ-45 or LAN ports
                      3. PoE type

                      POE TYPE

                      Select the Right Type of Power Over Ethernet for the Project

                      Let’s confirm a few details to make sure you’re picking the right Power Over Ethernet for Your Application.

                      Let’s check your end product datasheet to find out what you need in terms of data throughput.  Can’t find it?  Here are some tips for you.

                      10/100 (Half Duplex)

                      If it’s not called out on your spec sheet, PoE Lighting, kiosks, IP phones, IP cameras, and non-PoE applications typically work fine with 10/100 or Fast Ethernet.

                      Gigabit (Full Duplex)

                      Protocols like Newtek’s NDI, streaming cameras, Dante, data transmission like Wifi, or other high bandwidth applications usually require gigabit data rates.

                      Wireless

                      Wireless communication rates will depend on your device.  Any more most IEEE 802.3ac device are gigabit. 

                      We will also check your device for the type of PoE you need.  If it’s not clearly specified, you can use the tips below as a rough guide:

                      IEEE 802.3af - PoE

                      Requires 12.9 watts of power or less:

                      10″ Tablets and smaller – iPad 10.2, iPad Mini, Amazon Fire

                      IP Cameras that are not Pan Tilt Zoom (PTZ)

                      IP Phones

                      Raspberry Pi – unless you’re really using the Raspberry Pi 4 hard

                      IEEE 802.3at - PoE+

                      Requires 25.5 watt of power or less:

                      Any tablet with a USB-C port using our GAT-USBC-PD or GAT-USBC converters

                      iPad Pro 12.9″, Surface Go, Samsung Tab

                      Pan Tilt Zoom (PTZ) cameras or cameras with some heaters

                      Dual radio Wifi Access Points

                      Smaller Point to Point Radios

                      IEEE 802.3bt - PoE++ or 4PairPoE

                      This breaks into two categories:

                      Type 3 – 60 watts or less

                      Type 4 – 72 watts or less

                      Signage including most Intel NUC’s

                      Lighting or Automation

                      30″ Displays and Above

                      Long Distance Extenders

                      Passive PoE - 24 or 56 Volt

                      You know if you fall into this category if you’re working with Point-to-Point or Point-to-Multipoint Wireless Radio Communication.  Are you a WISP?  Then you need to know whether your device requires passive PoE.

                      What do the PoE Standards Mean?

                      POWER SOURCE TYPE (PSE)

                      Once you know the PoE type, now you can can pick the power sourcing equipment (PSE)

                      In general, you have two options when selecting PoE Power Sourcing Equipment (PSE): PoE switch or PoE midspan. The decision really comes down to three key factors.

                      Why a PoE Switch?
                      • You have a new installation where you can set it up from scratch
                      • You don’t require any “non-standard” features from the switch
                      • You can afford the higher prices for the higher PoE standards
                      Why a PoE Midspan?
                      • You have an existing installation with settings you don’t want to change
                      • You require special networking features that drive up the cost of the switch and PoE combined
                      • You need a more cost effective approach to the higher PoE standards

                      PoE FOR A NON-PoE DEVICE

                      If your device has integrated PoE, you can skip this section.  Otherwise, we should talk about connectors to make non-PoE devices PoE powered.

                      This usually can be solved by the type of connector your device has, which will be a surprisingly important feature. You use the connector type to select the PoE splitter or adapter for your application.

                      PoE Total Power Budget

                      Now you need to calculate to total power budget for your poe switch or midspan.

                      Isn’t there a calculator for things like this?

                      Why, yes, there is.

                      Download our free PoE Calculator app from the App or Google Play Store by clicking the links below.

                      Or visit us online at:

                      https://www.poetexas.com/poe-calculator

                      PREPARE TO DO THE PROJECT

                      You already have all the information you need to select and source your PoE devices, these next steps are just some best practices we hope you will find helpful.

                      PREPARE A BILL OF MATERIALS (BOM)

                      Now that you’ve answered a lot of questions, you’re ready to prepare your Bill of Materials to help you source all of your products!

                      DON’T FORGET

                      While you’re at it, don’t forget to make sure you have all the tools you’ll need for the installation. There’s nothing worse than having to go back for more tools!

                      YOUR POWER OVER ETHERNET PROS

                      WOULD YOU LIKE MORE HELP?

                      We pride ourselves in the level of customer support we’re able to offer our customers. If you’d like more support on your project, feel free to contact us to speak with a PoE expert who can help you build your project.

                      or

                      Check Out Our Other Helpful Blogs and Videos

                      2 + 6 =

                      Configuring Cisco Enterprise for PoE to USB-C

                      Configuring Cisco Enterprise for PoE to USB-C

                      Configuring Your Cisco 9300 or 9400 Switch for PoE+

                      To Include PoE+ Devices Like the PoE to USB-C Converter for Surface Go, iPad Pro, Samsung Tab, or Any USB-C device

                      Running Into Charging Issues with Your PoE+ to USB-C Converter or Other PoE Devices?

                      There’s a little known default feature in your Cisco enterprise switch that prevents you from getting the most out of your PoE+ devices, especially when using a PoE+ to USB-C converter for iPad Pro, Surface Go, Samsung Tab, and other devices.

                      While your Cisco 9400 or 9300 model switches are rated for PoE+ and capable of negotiating PoE+ class 4 devices, they will default to only negotiating 15.4 watts with your PoE converter unless you configure your switch for 2 event classification.  USB-C devices, including the Surface Go and Surface Go 2, require 18 watts or more to charge properly and communicate.  You can see why below

                      In that case, you’ll know the default setting is wrong because:

                      1 – You’ll see the port only negotiates 15.4 watts of power

                      2 – Your USB-C device will either not charge properly or will begin to lose battery charge even if it shows it is charging

                      Click Here to See the Cisco Instructions

                      * Please remember to write the running configuration to the start up confguration to ensure these changes survive a reboot of the switch.

                      Configuring Your Enterprise Switch for 2 Event Classification

                      Fortunately, it’s a quick, well-documented setting you just need to update for the ports you’re planning to use for your PoE+ device.  You can find the instructions from Cisco here:

                      2 EVENT CLASSIFICATION

                      Or just go to your switch terminal and follow these steps:

                      Switch> enable

                      Switch# configure terminal

                      Switch(config)# interface gigabitethernet2/0/1

                      You can also configure multiple ports on a switch at one time by choosing a range like

                      “gigabitethernet2/0/1-24”

                      Switch(config-if)# power inline port 2-event

                      Switch(config-if)# copy running-config startup-config

                      Switch(config-if)# end


                      Why Doesn’t PoE Texas Just Make Their Devices LLDP Compatible?

                      You can read our white paper on why PoE LLDP is not compatible with the IEEE 802.3 PoE devices and USB.

                      Simply put, LLDP and USB are not compatible power standards.  They simply work differently.

                      While we recognize the huge benefits to our customers to not require them to reconfigure their switches, the challenge comes down to what LLDP is and how USB works.  LLDP is designed for computers and processors to share vital information with each other at the lowest level possible which works great for an end device like a computer or a phone with a processor on-board and its MAC address, in particular for our case one that can boot and start communicating in a low power mode.

                      Unfortunately, USB-C devices and the USB protocol doesn’t behave that way.  Take a Microsoft Surface Go or an iPad Pro, for example.  Their default initial power demands are 18-22 watt PD profiles.  If you connect a USB-C hub or dock that offers to provide power to the device without the correct power delivery profiles sufficient to charge the battery, it will reject the device and disable the USB-C port which protects your device from defective or improperly built USB devices.  You want that.

                      On the other hand, it is the end device like the PC or tablet that does LLDP communication with the network once it is connected.  So it will not connect to the network through the USB-C port until it has received a correct power profile from the hub.   So in this case, the iPad Pro or Surface Go cannot communicate its power requirements back to the network switch until after it has received sufficient power to make the connection.


                      And, since you’ll likely point out that the LLDP can happen before you connect the power by disabling the USB-C PD, yes, you can conceivably start with a charged tablet negotiating power then turning on the Power Delivery charging.  There are two challenges there as well:

                      1 – We would need to customize the LLDP drivers on all devices which is considered basically a change to the kernal level programming since this communication works at the lowest levels.  Device manufacturers control that very carefully and will be slow to consider that change.

                      2 – Even if we did achieve that level of change, if the device drains the battery for any number of reasons including power outages or being disconnected for a time, the tablet or PC would be unable to charge, boot up, connect LLDP, and start battery charging without the PD profile.  Experience has shown customers cannot guarantee that only charged devices will connect to the network.

                      So, yes, making switch changes does drive an added layer of configuration, the change provides more reliable and consistent performance in all situations with your USB-C device.

                      Haven’t Found What You Need?  We’re Happy To Help Solve Your Problem.

                      Drop Us a Line to Schedule a One-on-One Consultation

                      14 + 13 =

                      POE-USBC-Kit

                      POE-USBC-Kit

                      POE-USBC-KIT INSTALLATION MANUAL

                      Welcome to the PoE Texas Manual for the POE-USBC-Kit that gives you 40 watts of USB Type C power and Gigabit data over a single network cable for iPad Pro’s and other USB-C tablets!


                      The purpose of the manual is to help you quickly and effectively navigate the installation and functions of your new Power Over Ethernet kit. 


                      Our goal is to make our products as intuitive and simple to use as possible, so we value your feedback and questions directly to us at service@poetexas.com.  Phone +1-512-479-0317.


                      Or you’re always welcome to leave questions or comments on our product page: POE-USBC-Kit

                      What’s Inside

                      PARTS LIST:

                      • 1 X 32 VOLT 60 WATT POWER SUPPLY
                      • 1 X 2.1 TO 2.1 Y CABLE ADAPTER
                      • 1 X GPOE-1AB MIDSPAN INJECTOR
                      • 1 X POE-USBC PASSIVE POE SPLITTER

                      The things you want to make sure you get are:

                       – Patch cables for the data to the midspan and from the splitter to the device

                       – USB Type C male to male cables in the configuration you need

                       – Screws for mounting the devices

                       – Homerun data cable

                      If you’re looking for a Power and Data over USB Type C solution, we can also offer a USB Type C hub with a female connector in OEM quantities.

                        General Installation

                        In order to overcome the power limitations of PoE+ which limits a Powered Device to 25 watts, we have opted to use a Passive PoE allowing up to 41 watts in a full kit.  

                        You must use the PoE Texas provided midspan and power supply included in this kit to ensure the optimal performance.  If you need a multi-port alternative, please contact us at poe.shifu@poetexas.com or 512-479-0317.

                        The installation is simple and only requires a few minutes to set up with now specialty tools.

                        • Go to the power and/or data source location whether its a server room, IDF, or a space provided near an AC outlet and/or datasource.
                        • Mount the GPOE-1AB using the M3 mounting tabs near enough to an outlet to allow the 3′ power supply to connect.
                        • Plug the 21-Y cable into the power port on the top and the bottom of the GPOE-1AB.
                        • Plug the 32 volt power supply into the female end of the 21-Y cable.  Then plug it into the wall outlet.  You will see power is available when the two LED lights turn green.
                        • Run the home-run cable to the final tablet location.
                        • Mount the POE-USBC onto a surface near the tablet computer.  The POE-USBC can be left as an inline device if you want to.
                        • Connect the home-run cable.  The power is functional as soon as the yellow and green LED lights turn on.
                        • Connect the USB Type C cable from the female port of the POE-USBC to the tablet computer.
                        • (Optional) You can use the RJ-45 port on the POE-USBC to connect the data.  If you’d like combined power and data, we can supply an OEM hub.  Otherwise, we’ll come out with the GAT-USBC-PD soon.

                        CONFIGURATION

                        Technical Specifications

                        Product Specifications

                        Adapter length 3 ft AC Cable
                        Adapters included Y-Cable
                        Certifications CE, FCC, UL
                        Data Rate 10/100/1000
                        Efficiency 90%
                        Input Frequency Range 50/60 Hz
                        Input Voltage Range 120-220 VAC
                        Max Power for Kit 41 watts
                        Mount Type Wall and DIN Rail (Not Included)
                        Operating Humidity 5% to 90%
                        Operating Temperature Range -10 – 60C
                        PoE Method Passive PoE
                        PoE Mode/Pinout Mode A/B
                        Weight 14 oz

                        If you find this learning center helpful, like and subscribe on your social channels to learn when we post new guides!

                        GPOE-48v10w; GPOE-24v30w

                        GPOE-48v10w; GPOE-24v30w

                        GPOE-48v10w; GPOE-24v30w INSTALLATION MANUAL


                        Welcome to the PoE Texas Manual for the GPOE-48v10w and GPOE-24V30w! 

                        The purpose of the manual is to help you quickly and effectively navigate the installation and functions of your new Power Over Ethernet Adapter.

                        Our goal is to make our products as intuitive and simple to use as possible, so we value your feedback and questions directly to us at service@poetexas.com.  Phone +1-512-479-0317.

                        Or you’re always welcome to leave questions or comments on our product pages: GPOE-48v10w.

                        What’s Inside

                        PARTS LIST:
                        • 1 X POE CONVERTER
                        Yep, that’s right.  No separate cables or missing parts.  Everything is here.
                        If you want, you could pick up a DC wire to 2.1 mm jack from Amazon, like these.

                          General Installation

                          As an inline device, there’s no need to mount or secure the GPOE-48v10w.  Simply plug it in either the male RJ-45 port that has PoE at 12-30 volts or a network port and the female DC barrel jack with DC power from 12-30 volts.
                          If you need to mount it, you could choose to use an adhesive backed or screw down cable bracket and secure the cables which will be sufficient to hold the GPOE-48v10w.
                          Then, connect the home run cable to your 48 volt PoE device into the female port on the device.

                          CONFIGURATION

                          There is no configuration necessary with this device.  Simply plug it in.
                          The yellow LED indicates power on the primary side (your 12-30 volt side).  The green indicates power on the secondary (48 volt side).

                          Technical Specifications

                          Product Specifications

                          Certifications CE, FCC, RoHS
                          Connector Types DC Barrel / RJ-45
                          Data Rate 10/100/1000
                          DC connector 5.5 x 2.1 mm DC
                          Dimensions 1x2x6 in.
                          Input Voltage Range 12 to 30 volts DC and PoE
                          Max Power for Kit 10 watts
                          Max. Amps Per Port 200 mA output
                          Operating Humidity 5% to 90%
                          Operating Temperature Range -10 – 60C
                          Output Voltage 48 volts
                          PoE Method Passive
                          PoE Mode/Pinout Input: Mode B (+4,5 -7,8) / Output: Mode A (-1,2 +3,6)
                          Power Input 2.1 mm DC in / RJ-45 In
                          Weight 0.14 lb

                          If you find this learning center helpful, like and subscribe on your social channels to learn when we post new guides!

                          GPOE-8A

                          GPOE-8A

                          GPOE-8A INSTALLATION MANUAL

                          Welcome to the PoE Texas Manual for the GPOE-8A that cost effectively upgrades any non-PoE switch or PoE switch to 30 watt passive PoE!

                          The purpose of the manual is to help you quickly and effectively navigate the installation and functions of your new Power Over Ethernet Midspan.

                          Our goal is to make our products as intuitive and simple to use as possible, so we value your feedback and questions directly to us at service@poetexas.com.  Phone +1-512-479-0317.

                          Or you’re always welcome to leave questions or comments on our product pages: GPOE-8A or GPOE-8A-48v60w or GPOE-8A-48v120w.

                          What’s Inside

                          PARTS LIST: GPOE-8A (No Power Supply)

                          • 1 X GPOE-8A

                          We do offer this injector by itself without a power supply so you can select a power supply to fit your application needs.

                          Or you can select a pre-kitted option below.

                          Additional items you’ll need not included:

                          1 – Screws for mounting

                          2 – Power supply

                          3 – Patch cables to the switch and home run cables to the device

                          NEED HELP PICKING A POWER SUPPLY?  USE OUR POE CALCULATOR TO CREATE A POWER BUDGET.

                          PARTS LIST: GPOE-8A-48v60w

                          • 1 X GPOE-8A Midspan Injector
                          • 1 X PS-48v60w 48 volt 60 watt DC power supply

                          We do offer this injector by itself without a power supply so you can select a power supply to fit your application needs.

                          Additional items you’ll need not included:

                          1 – Screws for mounting

                          2 – Power supply

                          3 – Patch cables to the switch and home run cables to the device

                          PARTS LIST: GPOE-8A-48v120w

                          • 1 X GPOE-8A Midspan Injector
                          • 1 X PS-48v60w 48 volt 120 watt DC power supply

                          We do offer this injector by itself without a power supply so you can select a power supply to fit your application needs.

                          Additional items you’ll need not included:

                          1 – Screws for mounting

                          2 – Power supply

                          3 – Patch cables to the switch and home run cables to the device

                          General Installation

                          A midspan like the GPOE-4A is a simple device to add into any network, and the purpose is to add or increase the PoE of your network without having to upgrade or pick a less optimal switch.


                          With this wall mounted device, simply mount it near the networking switch you’d like to pair it with.  Then, using a short Ethernet patch cable from the switch’s data port to the LAN port on the PoE midspan.   Then the POE port adjacent to the LAN port will now have that 30 watt potential power budget.

                          NOTE: a midspan adds PoE to one data port at a time.  So if you connect LAN 1 to a data port on your switch you’ll have Mode A POE on port 1 of the midspan [wait . . . what’s Mode A mean?].  To get POE on port 2, you need to add a patch cable on LAN 2 back to the switch,  And so on.

                          Then connect the POE port to your PoE enabled device.

                          WARNING: this is a passive PoE midspan, meaning it does not negotiate the IEEE 802.3af standard before delivering power.  What does that mean for you?  You should only connect the POE ports to a PoE enabled device.  Connecting it to a laptop or other non-PoE device will damage the network card on your device.

                          So why even use a passive PoE midspan?  Besides being very cost effective, they’re simple, robust devices that work well even when you forget about them.  So as long as the connected device is PoE and no one can unplug it – say a security camera or wifi access point – it makes sense.

                          CONFIGURATION

                          There is no configuration necessary with this device.  Simply plug it in.

                          The green LED indicates power on.   If the green light begins to blink at any time, it is an indication that one of the POE ports has shorted out or overloaded.

                          STEPS:

                          1 – Unplug the POE ports one at a time to determine which port is having the issue

                          2 – Troubleshoot the port to determine whether the cable or the device is grounded

                          Technical Specifications

                          Product Specifications

                          Data + PoE Ports 4
                          Data Ports 4
                          Data Rate Gigabit
                          Dimensions 4x3x1 in.
                          Max. Amps Per Port 1.25
                          Mount Type wall
                          Operating Humidity 5% to 90%
                          Operating Temperature Range -10 – 60C
                          PoE Method Passive
                          PoE Mode/Pinout Mode A (1,2- 3,6+)
                          Power Input 2.1mm DC

                          If you find this learning center helpful, like and subscribe on your social channels to learn when we post new guides!

                          GAT-IW-Mount

                          GAT-IW-Mount

                          GAT-IW-Mount

                          Welcome to the PoE Texas Manual for the GAT-IW-Mount, our in-wall mounting accessory for the PoE+ line of splitters and converters.

                          The purpose of the manual is to help you quickly and effectively navigate the installation of your new Power Over Ethernet Accessory.

                          Our goal is to make our products as intuitive and simple to use as possible, so we value your feedback and questions directly to us at success@poetexas.com.  Phone +1-512-479-0317.

                          Or you’re always welcome to leave questions or comments on our product page: GAT-IW-Mount

                          What’s Inside

                          PARTS LIST:

                          • 1 X WALL MOUNT BRACKET
                          • 1 X MOUNTING TAB
                          • 1 X HOLE TEMPLATE CARD


                          GENERAL INSTALLATION


                          Your in-wall mount is designed to install into a wall the same way as a low voltage wall bracket.  So it does require a few tools to install, namely:


                          • Drywall saw or oscillating tool
                          • Pencil
                          • Screw driver

                          First, locate  where you’d like to use the accessory.

                          Second, use the included card to mark the opening.

                          Third, cut the opening.

                          Fourth, set the mount into the opening and use the screw driver to secure it to the wall.

                          Finally, slide in your GAT device and use the optional mounting tab as necessary.

                          CONFIGURATION

                          There is no configuration necessary.  This accessory fits all of our GAT line of products from our PoE to USB-C converters to our PoE to 5 Volt Splitters.

                          Technical Specifications

                          Product Specifications

                          Dimensions 4.25 x 2.6 x 1.75 Inches
                          Mount Type Inwall 

                          If you find this learning center helpful, like and subscribe on your social channels to learn when we post new guides!

                          AT-1-55v30w

                          AT-1-55v30w

                          AT-1-55v30w

                          Welcome to the PoE Texas Manual for the AT-1-55v30w that uses a wide range of DC input, in particular from solar power systems, and converts it into IEEE 802.3at Power Over Ethernet!


                          The purpose of the manual is to help you quickly and effectively navigate the installation and functions of your new Power Over Ethernet Midspan. 


                          Our goal is to make our products as intuitive and simple to use as possible, so we value your feedback and questions directly to us at service@poetexas.com.  Phone +1-512-479-0317.


                          Or you’re always welcome to leave questions or comments on our product pages: AT-1-55v30w.

                          What’s Inside

                          AT-1-55v30w

                          PARTS LIST:

                          • 1 X Midspan Injector


                          Additional items you’ll need not included:

                          1 – DIN rail

                          2 – Patch cables to the switch and home run cables to the device

                          3 – DC cable to solar charge controller

                          General Installation

                          A midspan like the AT-1-55v30w is a simple device to add on to a network port, and the purpose is to add PoE using a wide range of input power to any network.


                          With this DIN rail mounted device, simply mount it on a DIN rale near the networking switch you’d like to pair it with.  Then, using a short Ethernet patch cable from the switch’s data port to the LAN port on the PoE midspan.   Then the POE port adjacent to the LAN port will now have that IEEE 802.3at (30 watts) power budget and up to gigabit pass through data.  Finally, connect the DC power supply to the Phoenix style connector on the top.


                          The AT-1-55v30w is also surge protected, so, while it cannot be mounted outdoors by itself, you can connect it to outdoor devices with confidence.  In order to make the surge protection fully functional, you will need to properly ground the connector on the side of the device.


                          Not sure what grounding is?  Panduit has some great graphics around grounding.

                          CONFIGURATION

                          There is no configuration necessary with this device.  Simply plug it in.

                          The green LED indicates power on.  If the green light begins to blink at any time, it could indicate there is a short in the circuit or a compatibility issue.


                          STEPS TO TROUBLESHOOT:

                          1 – At the injector, disconnect the PoE port from your device.  Use a PoE Tester to confirm the device is able to power on using a short jumper cable.

                          2 – At the other end of the network cable to your device, disconnect the device and use the PoE Tester to confirm it is able to negotiate PoE.

                          3 – Connect the PoE Tester to the end device to monitor power consumption.


                          If you’re able to power on the device with the PoE Tester inline, it’s likely a compatibility issue.  Please contact us at service@poetexas.com to find you the right solution.

                          Technical Specifications

                          Product Specifications

                          Certifications UL/CE/FCC
                          Data + PoE Ports 1
                          Data Ports 1
                          Data Rate Gigabit
                          Dimensions 5.25 x 1.325 x 3.75 in.
                          Display Type LED – Power (Power is on); Active (PoE has negotiated)
                          IEC Protection Class IP 40
                          Input voltage 12-24 VDC (Tested up to 30 VDC)
                          Load Regulation 6 KV Surge Protection
                          Max Current 4 Amps
                          Max Power for Kit 30 Watts
                          Max Voltage 55 volts
                          Max. Amps Per Port 550 mAmps
                          Mount Type DIN
                          Operating Humidity 20% to 80%
                          Operating Temperature Range -40 – 65 C
                          Output Voltage 55 volts
                          PoE Method IEEE 802.3af, IEEE 802.3at,
                          PoE Mode/Pinout Mode B (+4,5 -7,8)

                          If you find this learning center helpful, like and subscribe on your social channels to learn when we post new guides!

                          Connect USB Type C to Network Power and Data

                          Connect USB Type C to Network Power and Data

                          USB Type C and Power Over Ethernet

                          Connect USB Type C Devices to Network Power and Data

                          You’ve seen the new USB Type C ports appearing on your new devices, like the one on your new tablet or laptop.  Perhaps you’ve even seen some of the specifications for how it can communicate a lot of data very quickly and provide power for monitors and other larger devices.  USB-C is cool, there’s no doubt about that.

                          So, let’s talk about how to integrate it into your smart building.

                          What Does Power Over Ethernet Bring to USB-C?

                          As a standard USB-C offers amazing communication speeds and power delivery up to 100 watts.  At first glance, it looks like the one cable to rule them all.  Google, Microsoft, Apple, Dell, Samsung, and more have switched to the new powerful USB-C port.

                          Unfortunately, it does have a weakness.  A USB-C cable can only transmit power less than ten feet (three meters), and the cable infrastructure comes at a cost premium.  On the other hand, ethernet cable, nearly ubiquitous in modern buildings, can transmit power and data 328 feet (100 meters).  USB-C power and data transmitted over Power Over Ethernet significantly lowers the cost of adopting USB-C by eliminating the need for new electrical infrastructure.  How can you combine the convience of PoE with the power of USB-C?

                          Comparing USB-C and PoE Features

                          A quick comparison of the USB-C and PoE features will highlight why combining PoE and USB-C adds the most value to intelligent building infrastructure.

                          Convert Power over Ethernet to Power and Data on one cable for USB-C

                          PoE Texas has developed the patent pending converter that connects Power Over Ethernet to USB Type C with both power and data communication.

                          The converter interfaces the two standards seemlessly so there are no configurations to set and no programming to do.  

                          Simply plug and play

                          Ready to Learn More?

                          Check out our videos on PoE to USB-C.


                          Or visit our technical manual section

                          Haven’t Found What You Need?  We Do Custom Solutions

                          Drop Us a Line to Schedule a One-on-One Consultation

                          5 + 9 =

                          BOX IT Design

                          BOX IT Design

                          Elegant – Robust – Secure

                          Visualizable & 3D

                          Let us help you to visualize your project. We have in house illustrators, the expertise and experience. Illustrations will safe you time and cost and always result in better solutions

                          Forward Thinking

                          We have been around from the beginning of the online World. Predicting is a strong word, but we can give you a good idea of where things are heading – ensuring a lasting solution

                          Challenge us

                          We love challenges because they let us work with issues that can resolve to new products, benefitting our customers and company. Feel free to contact us with projects outside the standards.

                          Customer Support

                          Everyone and any product may need support. We strive to support our customers as pragmatic as possible. Working solutions is not only in the interest of our customers – it justifies our existence

                          Learn More about BOX IT Design:

                          www.boxit-design.com

                          PS-53v3000w

                          PS-53v3000w

                          PS-56v3000w

                          Welcome to the PoE Texas Manual for the 56 volt 3000 watt managed power supply for building infrastructure!

                          The purpose of the manual is to help you quickly and effectively navigate the installation and functions of your new Power Over Ethernet Power Supply.

                          Our goal is to make our products as intuitive and simple to use as possible, so we value your feedback and questions directly to us at service@poetexas.com.  Phone +1-512-479-0317.

                          Or you’re always welcome to leave questions or comments on our product page: PS-53v3000w.

                          What’s Inside

                          PARTS LIST:

                          • 1 X MANAGED POWER SUPPLY
                          • 2 X 12 AWG DC POWER CABLES
                          • 1 X AC POWER CABLE
                          • 1 X TEMPERATURE SENSOR WIRE KIT


                          WHAT YOU NEED:

                          • 4 X RACK MOUNTING SCREWS AND NUTS
                          • PATCH CABLE TO CONNECT TO THE SWITCH FOR MANAGEMENT


                          * The kit has the supplies necessary to power the GBT-24-M up to a full 2,000 watts

                          General Installation

                           Your new PoE injector is designed to be simple to install and set up.  You should only need at most a Philips head screw driver and a patch cable for the management console.

                          NOTE: The injector includes the screws for the rack wings, but it does not include the rack mounting nuts or screws.  So, you’ll want to grab some of those.

                          Rack Installation

                          The power supply comes pre-assembled with brackets for a 19″ rack configuration.  Please contact us if you need a different rack.  It DOES NOT come with the nuts and screws to mount the injector onto the rack.  You’ll need to get those.

                          Your Title Goes Here

                          Your content goes here. Edit or remove this text inline or in the module Content settings. You can also style every aspect of this content in the module Design settings and even apply custom CSS to this text in the module Advanced settings.

                          Wiring the Power Supply

                          WARNING: THIS INVOLVES WIRING AC POWER AND SHOULD BE PERFORMED BY A QUALIFIED PROFESSIONAL.

                          SELECTING THE POWER SOURCE: This power supply can draw more than 2,000 watts of power.  A typical 15 amp, 120 VAC circuit breaker will trip at 1,800 watts.  If you just plug it into a regular 15 amp circuit with other lights and outlets, it will draw enough power to trip the breaker.  For a full lighting application, it requires a dedicated 20 amp circuit.

                          STEPS:

                          • Ensure power is properly disconnected from the wiring to the device

                                      This may mean either keeping the included AC cable unplugged or shutting off the breaker to the circuit.

                          • Connect the AC power to the AC input. 

                          “L” is typically a black wire

                          “N” is typically a wire wire

                          Ground is typically green

                          Tip: Use a small, flat head screw driver inserted into the small square hole to “open” the push-in connector before inserting the cable.  Once the cable is pushed all the way in, remove the screw driver to clamp onto the cable.  Test the connection by gently tugging the wiring.


                          Don’t forget to ground the cable and the power supply.


                           Now you can wire the DC side of the power supply.


                          DO NOT CONNECT POWER TO THE DEVICE YET.

                          What do you do with a 3,000 watt 48-56 volt managed power supply? 

                          You power the PoE Texas 24 port Layer 2 PoE++ switch for lighting and automation: GBTS-28-24-M (See wiring)

                          Configuration

                          You can configure the PS-53v3000w either through screen and controls on the device, though a webpage management tool, or even through an SNMP interface.

                          In this manual we’ll cover the details for the on-screen and web interface.  If you’d like to see the manual for the other configuration methods, you can find it here:

                          SUPER TECH MANUAL – PS-53v3000w

                          In this manual we’ll demonstrate how to navigate the onscreen and web interface to be able to:

                          • Monitor the status of the device
                          • Adjust the output voltage
                          • Change the device passwords
                          • Change the device ID
                          • Change the device Date and Time
                          • Change the IP address

                          Operating The LCD Screen

                          Change the Charge and Output Voltage

                          Follow these steps:

                          Click the return button to enter the Menu          ↵

                          Right arrow to navigate to Settings                      →

                          Return button to enter the Menu                          ↵

                          Return button to enter the Password                  ↵

                          Return button to enter Batt Settings                   ↵

                          Up arrow to navigate to Charge Settings            ↑

                          Return button to enter Charge Settings             ↵

                          Return button to edit                                             ↵

                          Right arrow to navigate to Place Holder            →

                          Up arrow to change settings                                 ↑

                          Back arrow when finished                                    ⊂

                          View Status

                          Simply click the right arrow (>) to scroll through:

                          Main Display – Date, Volt In, Volt Out, and Total Load

                          Battery Status

                          Temperature  – Battery and Ambient

                          Inverter Status – Not used in this configuration

                          Alarm Status – Inverter (not used) and System Status

                          Change the System Configuration:

                          Follow these steps:

                          Click the return button to enter the Menu          ↵

                          Right arrow to navigate to Settings                       →

                          Return button to enter the Menu                          ↵

                          Return button to enter the Password                   ↵

                          Right arrow twice to navigate to Settings          →          →

                          Return button to enter the Sys Settings              ↵

                          Up arrow to change password to 1000                ↑

                          Return button to enter the Password                  ↵

                          To Change the Passwords:

                          Right arrow to select Password 1                           →

                          Right arrow twice to select Password 2               →          →

                          Up arrow to select the password                           ↑

                          Return button to edit                                              ↵

                          Use th up and right arrows to edit                       ↑              →

                          Return button to finish                                          ↵

                          Back to Sys Settings                                                ⊂

                          Right arrow to navigate to Date                           →

                          Up arrow to change settings                                 ↑

                          Back arrow when finished                                    ⊂

                          Web Management

                          CONNECTING TO THE CONSOLE

                          The PS-53v3000w has a web-based management interface that can be accessed through the console port on the front of the power supply.  Before you integrate it into your network, you will need to configure the device such as setting the date and time, IP address, and username and passwords.

                          First you need to connect the console port on the front of the power supply to a computer.  If you don’t have an ethernet port on your laptop, this works just fine with an ethernet to USB adapter.Then power on the power supply.  The settings will remain in the device even if you power it off and power it on again.

                          Now comes the techiest part of the process.  You will need to disconnect your computer for wifi and the internet.  I know this feels very dangerous, but it’s only for a moment.

                          I’m giving the instructions here for a Windows computer.  If you need help doing this on a MAC, simply go to YouTube and search on setting an fixed IP address for a MAC.  Then use the IP address information I give below. 

                          In Windows, navigate to your Network and Sharing Center.  If you don’t know how to get there, simply click on the Window button on the bottom left and type “Network and Sharing Center”.

                          When it comes up, you should see an ethernet connection.  If not, double check 1) you’re connected to the injector, and 2) the injector is powered on.Click on the ethernet connection.  It will bring up a dialog box.Click “Properties” on the bottom left.

                          In the next dialog box, look in the middle for “Internet Protocol Version 4”.  Click on it, then click “Properties” in the bottom right.  

                          Fill out the fields just like this.

                          Click: User the following IP address

                          IP Address: 192.168.1.20

                          Subnet Mask: Sets itself

                          Default Gateway: 192.168.1.1


                          Preferred DNS Server: 8.8.8.8

                          Alternate DNS Server: 4.2.2.2

                          Hit Okay to close this dialog, then Okay one more time.

                          I’ve tried not hitting okay the second time, and I couldn’t get it to connect.  So, make sure it hit okay to close out the two dialogs.

                          Then navigate to 192.168.1.190.  

                          The video below will take you through the rest of the configuration.

                          Depending on your model, your username and password maybe different.  If the password in the video does not work, please try this default username and password:

                          Username: admin

                          Password: password

                          Heat Load Calculator

                          The PS-53v3000w does put off enough heat when under load that it’s important to consider how you will deal with the heat.  The key considerations are:

                          • The PS-53v3000w operates well up to 55 C or 131 F in local ambient conditions
                          • Local ambient conditions mean the space where the power supply will be located
                          • While an office space may be at 75 F, a fully enclosed rack without ventilation can easily go above 130 F
                          • Ideally the PS-53v3000w is installed in the rack with at least 1u space between it and the GBTS-28-24-M
                          • Racks should either be open in the back or have good, reliable forced ventilation to move around around and out of the cabinet
                          • The room outside, typically an IDF or MDF, the rack or cabinet should have local temperature control through a thermostat and air handling unit
                          • See the Heat Load Calculator to see how to size any air handling or air conditioning requirements

                          To estimate the heat load of the GBTS-28-24-M power supply, visit that Heat Load Calculator.

                          Technical Specifications

                          Product Specifications

                          AC Plug Connector Type Spring Cage Clamp 12 AWG
                          Adapter length 3 ft
                          Cable connector length 2 ft
                          Certifications CE, FCC, UL
                          Dimensions 19 x 13 1/4 x 1 3/4 in
                          Display Type LCD
                          Efficiency >90% at full load
                          Input Frequency Range 45 – 65 Hz
                          Input Voltage Range 85-290 VAC
                          Management Port 1
                          Max Current 40 amp
                          Max Power for Kit 6000 watts at 200 VAC, 3000 watts at 120 VAC
                          Max Voltage 42-58 volt DC
                          Mount Type Rack
                          Operating Temperature Range -40 – 55 degrees C
                          Output Voltage 53 Volts
                          Power Supplies Hot Swappable Dual Rectifiers
                          Weight 13 lbs 12.2 oz

                          If you find this learning center helpful, like and subscribe on your social channels to learn when we post new guides!

                          Heckler Design

                          Heckler Design

                          Protecting The World from Boring Hardware

                          Make It Simple

                          Make It Simple

                          Creating simplicity is hard. We go the extra mile to ensure our products are as simple as they can be.

                          impressive


                          Make It Impressive

                          Our products are built to last a lifetime. We believe objects that can last a lifetime should be exciting and beautiful.

                          arizona

                          Make It Here

                          We love making things. We demand to see our products made in our hometown, to our demanding standards.

                          Learn More about Heckler Design:

                          www.hecklerdesign.com

                          GBT-24-M

                          GBT-24-M

                          GBT-24-M

                          Welcome to the PoE Texas Manual for the 24 port Layer 1 Managed 4 Pair PoE Injector!

                           The purpose of the manual is to help you quickly and effectively navigate the installation and functions of your new Power Over Ethernet Injector.

                           Our goal is to make our products as intuitive and simple to use as possible, so we value your feedback and questions directly to us at service@poetexas.com.  Phone +1-512-479-0317.

                           Or you’re always welcome to leave questions or comments on our product page: GBT-24-M.

                          What’s Inside


                          PARTS LIST:

                          • 1 X MIDSPAN INJECTOR
                          • 2 X RACK MOUNT BRACKETS
                          • 8 X SCREWS (FOR RACK MOUNT)

                          WHAT YOU NEED:

                          • 4 X RACK MOUNTING SCREWS AND NUTS
                          • 24 X 6″ PATCH CABLES TO CONNECT TO THE SWITCH PORTS
                          • POWER SUPPLY* AND/OR TERMINATION CABLES

                          * The GBT-24-M does not have an integrated AC-DC power supply to give you power flexibility.  See the section on About the Power Supply.

                          General Installation

                           Your new PoE injector is designed to be simple to install and set up.  You should only need at most a Philips head screw driver and a patch cable for the management console.

                          NOTE: The injector includes the screws for the rack wings, but it does not include the rack mounting nuts or screws.  So, you’ll want to grab some of those.

                          Desktop Installation

                          The GBT-24-M doesn’t have much of a “desktop” application, however, you can set it on a desk or a shelf.  The unit requires ventilation on the sides and top for maximum efficiency, so we do not recommend stacking other equipment directly on top of it. 

                          You can use stand off feet on a product above it to give room for air circulation.

                          Rack Installations

                          The injector comes with brackets for a 19″ rack configuration.  Please contact us if you need a different rack.  It DOES NOT come with the nuts and screws to mount the injector onto the rack.  You’ll need to get those.

                          Also, a midspan injector DOES NOT manage data.  You need one network switch port for each port of the midspan injector.  So . . . get at least 24 x 6″ patch cables to connect the GBT-24-M to the switch ports.

                          It’s what we call ONE to ONE.   Want to learn the difference between an injector and a switch?   Check it out here. 

                          STEPS:

                          1. Using the 8 x small screws provided in the box, attach the two rack brackets to either side of the switch so that the brackets face the front as in the image above
                          2. Using rack screws and nuts (not provided) mount the switch into the rack space (the switch will use 1u of rack space)
                          3. Plug the switch into an outlet
                          4. Start plugging in your PoE and non-PoE devices

                          About the Power Supply

                          The GBT-24-M is designed to take 48-55 volt DC power.  You’ll notice there are multiple input power points on the back.  DON’T PANIC!

                          The injector can take power into any one of the termination points and share the power with all of the ports.  

                          We’ve provided multiple power terminations for your convenience and to ADD MORE POWER! 

                          Here’s how you can power the injector:

                          Option 1: DC barrel jacks.  Each DC jack has a 5 amp limit.  You can use this with normal power bricks with a 5.5 x 2.1 mm dc barrel at 48 volts with less than 240 watts.  There are two of them, so you can add a second powe brick to reach 680 watts using the DC barrel jacks.

                          Option 2: Push-in terminal sockets.  These have a 20 amp limit and are rated for 12 AWG wire.  We recommend crimp on ferrules to make inserting and removing the cable easier.  You can use 1 x set of 12 gauge wire to power up to 960 watts.  As you go up above 960 watts in total power draw, you will need to use a second port.  Above 1,920 watts, you will need to add a third input power cable. 

                          NOW YOU’RE COOKING WITH GAS!

                          HOW DO I KNOW HOW BIG MY POWER SUPPLY SHOULD BE?

                          You can use our PoE calculator to quickly calculate your expected load on the PoE injector.

                          Check it out here:

                          We do offer the 24 port managed midspan with a 6,000 watt (at 240 volt) managed rectifier for your convenience.

                          Check it out here: PS-55v3000w

                          WIRING DIAGRAMS FOR

                          GBT-24-M AND PS-53V3000W POWER RECTIFIER

                          Configuration

                          The following sections will show you how to use either the OLED screen on the front of the GBT-24-M or the web-based management console found on the back.  This section will talk briefly about what you can configure and manage with your GBT-24-M.

                          PORT CONFIGURATION:

                          You have three OIS Layer 1 settings you can manage by portwith this injector:

                          1. On / Off: You can force the port to power off or power on
                          2. Active / Passive: You can configure the port to use active IEEE 802.3 style negotiation to enable the port or you can set the port to passive and have power on all the time
                          3. Mode A / Mode A+B: You can choose whether the port will output:

                          – Mode A: 2 Pair PoE with maximum power of 25 watts for active or 30 watts for passive

                          – Mode A+B: 4 Pair PoE with maximum power of 60 watts for active or 80 watts for passive

                          BUT WHAT DOES THAT ALL MEAN?  See our PoE Tutorial Here

                          USE CASES AND RECOMMENDED PORT CONFIGURATIONS:

                          PoE Lighting or Automation

                          On

                          Active: 60 watt or less load

                          Passive: 80 watt or less load

                          Mode A+B

                          High Powered Point to Point or Point to Multi Point Communication

                           On

                          Passive

                          Mode A+B

                          Voip Phone, Wifi Access Point, PTZ Camera (IEEE 802.3at)

                          Default configuration

                          On

                          Active

                          Mode A

                          DEVICE CONFIGURATION

                          LOGIN CREDENTIALS:

                          You can modify the admin name and password

                          Default Username: admin

                          Default Password: admin

                          Please change that for your security.  Notes for passwords: Please use letters only.  Avoid numbers, and, in particular, zero.


                          You can also create a User name and password without access to change the device configuration.

                          Default User Username: useradmin

                          Default User Password: user

                          DEVICE IP ADDRESS / ID

                          The device’s ID is it’s IP address which can be customized to fit your network’s IP set up.


                          The device does not ask for a dynamically assigned IP address, so you will have to give it a fixed IP address.

                          PORT NAMES

                          You can create 7 character long names for each of the ports to make identifying and managing the device connected to that port easier.

                          You can find details on how to set these configurations in the sections below.

                          Operating The LCD Screen

                          Main Display

                          When you plug in the PoE injector, it will automatically boot up to the main monitoring page.  This screen gives you a great heads up display on the PoE situation with the whole injector.

                          So why make a PoE injector with a display like this since it’s already managed?  We’re considering the smart building situations where networks and infrastructure aren’t always in place when you need to start installing and testing new PoE devices such as lighting, displays, or sensors.  This display screen allows a user to see and manage the PoE on devices without having to have the full network installed and turned up.

                          So what does it all mean?

                          Top Row: This displays the IP address of your device so you can quickly reference where to go to find the management webpage

                          Second Row: The output voltage of the injector 

                           – So you can confirm what power your devices should be receiving and update your load calculations on the PoE calculator

                          Third Row: The total output current of the injector

                           – So you can confirm your total load

                          Fourth Row (First number): The total power consumption of the injector

                           – So you can measure and monitor your total power consumption

                          Fourth Row (Second number): The temperature inside the device

                           – So you can monitor temperature and avoid overheating

                          Button Navigation:

                          Navigating to a PORT:  From the main screen simply press the “Select” button.  You will arrive at PORT 1 which will blink.  If you’d like to manage PORT 1, simply push the “Select” button.  Otherwise, press the “Enter” button to scroll through the ports.  Once you’ve arrived at the port you’d like to manage, press the “Select” button.

                          Go Back to Previous Port: If you’d like to go backward between ports, press and hold the “Enter” button for 2 seconds.

                          Go Back to Main Screen: If you’d like to go back to the main screen, press and hold the “Select” button for 2 seconds.

                          Changing a PORT Configuration:  Once you’re at the port you’d like to configure, simply press “Select” until the setting you would like to change is blinking.  Once the setting is blinking, press “Enter” to change the state.   Once you’re done configuring, you can hold the “Select” button to return to the main screen.

                          • ON / OFF – This allows you to turn the current port on or off
                          • Active / Passive – This allows you to decide whether you want the port to do the IEEE PoE negotiation (active) or simply output power all the time (passive)
                          • Mode A / Mode A+B – This allows you to decide whether to limit the port to 30 watts with 2 pair PoE or to allow the port power 60 or 80 watts using 4 Pair PoE

                          By default each port is set to Active IEEE 802.3at (30 watt) 2 Pair PoE.  For lighting applications you will need to change it to Mode A+B for 60 watt devices.  If you need the full 80 watts, you’ll also need to set the port to Passive.

                          Want to learn more what those settings mean?  See our PoE Tutorial Here.

                          Other Important Controls: From the main menu screen:

                          • Pressing and holding the “Select” button for 3 seconds will cause the injector to soft reboot.
                          • Pressing and holding the “Enter” button for 5 seconds will toggle the temperature from Celcius to Fahrenheit.
                          • Restore to Factory Default: Pressing and holding “Select” and “Enter” for 3 seconds will restore the injector to factory default settings.

                          Web Management

                          CONNECTING TO THE CONSOLE

                          The GBT-24-M has a web-based management interface that can be accessed through the console port on the back of the injector.  The GBT-24-M can accept a dynamically assigned IP address.  First power on the injector using any 48-56 volt power supply.  Then connect the port on the back to to the network, and an IP address will appear on the front screen.

                          Finally, open a web browser and type the IP address in the URL Bar like this.

                          The default username is: admin

                          The default password is: admin

                          If for any reason you cannot get this to login in during the first set up, simply hold the “Select” and “Enter” buttons on the front of the injector until it resets to factory defaults.

                          CONNECTING TO THE CONSOLE FROM A PC

                          If you don’t have it connected to a network, you can follow the following directions to connect directly from your computer to the injector.  If you don’t have an ethernet port on your laptop, this works just fine with an ethernet to USB adapter.

                          Then power on the injector using any 48-56 volt power supply.  The settings will remain in the device even if you power it off and power it on again.

                          Now comes the techiest part of the process.  You will need to disconnect your computer from wifi and the internet.  I know this feels very dangerous, but it’s only for a moment.

                          I’m giving the instructions here for a Windows computer.  If you need help doing this on a MAC, simply go to YouTube and search on setting an fixed IP address for a MAC.  Then use the IP address information I give below.

                          In Windows, navigate to your Network and Sharing Center.  If you don’t know how to get there, simply click on the Window button on the bottom left and type “Network and Sharing Center”.

                          When it comes up, you should see an ethernet connection.  If not, double check 1) you’re connected to the injector, and 2) the injector is powered on.Click on the ethernet connection.  It will bring up a dialog box.Click “Properties” on the bottom left.

                          In the next dialog box, look in the middle for “Internet Protocol Version 4”.  Click on it, then click “Properties” in the bottom right.

                          Fill out the fields just like this.

                          Click: User the following IP address

                          IP Address: 192.168.1.20

                          Subnet Mask: Sets itself

                          Default Gateway: 192.168.1.1


                          Preferred DNS Server: 8.8.8.8

                          Alternate DNS Server: 4.2.2.2

                          Hit Okay to close this dialog, then Okay one more time.

                          I’ve tried not hitting okay the second time, and I couldn’t get it to connect.  So, make sure it hit okay to close out the two dialogs.

                          Finally, open a web browser and type 192.168.1.153 in the URL Bar.

                          The default username is: admin

                          The default password is: admin

                          If for any reason you cannot get this to login in during the first set up, simply hold the “Select” and “Enter” buttons on the front of the injector until it resets to factory defaults.

                          Heads Up Display

                          Once you’ve logged in, you’ll go directly to the Heads Up Display showing the status of all the ports on the injector.  You turn each port on or off as well as see:

                          • PoE Type: Active or Passive Negotation
                          • Power Consumed in mA (Current)
                          • Output Power Potential (Volts)
                          • Power Consumed in Watts

                          To cycle power on any particular port, simply click the toggle switch next to the port name you’d like to cycle power on.

                          Device Management

                          DEVICE Page
                          The device page allows you to configure your device.  You can:
                          • Modify the admin credentials
                          • Create a user credentials
                          • Modify the device’s IP address
                          • Reset the device to factory defaults

                          The admin credentials allow you to modify the device configuration.  A user account allows you to control the ports without changing the device configuration.  Notes for passwords: Please use letters only.  Avoid numbers, and, in particular, zero.

                          Default User Username: useradmin

                          Default User Password: user

                          PoE Mode

                          PoE Mode Page

                          This page allows you to decide whether to make the port:

                          • Passive or Active PoE
                          • 2 Pair or 4 Pair PoE


                          Active vs Passive PoE:

                          Active PoE is the traditional IEEE type PoE most devices use that requires a negotiation to turn on power.  90% of POE devices use this type of PoE, so it’s the default setting.

                          Passive PoE is a non-standard PoE that certain types of Wireless Data technology uses.   If you enable it with a non-PoE device connected to the port, it will damage the device. (We don’t expect many people are connecting non-PoE devices to a PoE injector, but strange things happen)


                           A quick note, though, this injector can output more power in passive mode than in active.  So, if you need more power for your PoE device, consider switching it to passive.  Speaking of which . . . 

                          2 Pair vs 4 Pair PoE

                          The difference between these two states comes down to how much power each port requires.  4 Pair PoE allows for double the power on a port:

                          2 Pair PoE Active

                          25 watts – Single Signature

                          2 Pair PoE Passive

                          30 watts – No signature

                          4 Pair PoE Active

                          60 watts – Dual Signature PoE

                          4 Pair PoE Passive

                          80 watts – No signature

                          Rename Ports

                          Rename Ports Page

                          On this page you can relabel how your ports to have customized seven character names to make them easier to manage.

                          REST API

                          Communicating with the GBT-24-M via Rest API

                          The GBT-24-M allows managing the injector through a RESTFUL API on a local network using this generalized statement:

                          curl -X GET http://username:password@IP_ADDRESS/API/? -d port=[port#] -d action=[ Mode | Read ]&Value=[as needed]

                          It accepts and responds to two types of local API calls:

                          1 – Read = returns Mode, mA, Volts, Watts  (for the selected port, or the total of all ports) 
                                      Mode – see values below

                          Read ALL ( port=ALL or port missing) returns the Input voltage, the total current for all ports, and Watts is the total current times the voltage.

                          Example statement:

                          curl -X GET http://admin:admin@192.168.5.66/API? -d port=12 -d action=read

                          Results in a returned statement:

                          { “mode”:”0″, “current”:”0″, “Volts”:”0.00″, “Watts”:”0.00″}

                          2 – Mode = sets mode to requested state

                                                          00 = off  and 01 = on
                                                          x1 = Passive enabled/active on mode B
                                                          x2 = 803.3af  enabled/active on mode B
                                                          x3 = 802.3at  enabled/active on mode B
                                                          1x = Passive enabled/active on mode A
                                                          2x = 802.3af  enabled/active on mode A
                                                          3x = 802.3at  enabled/active on mode A

                          Example statement: Turns the Port Off

                          curl -X GET http://admin:admin@192.168.5.66/API? -d port=12 -d action=Mode -d value=00

                          Results in a returned statement:

                          { “Port”:”12″, “SetMode”:”0″, “ModeA”:”0x80″, “ModeB”:”0x80″ }

                          Example statement: Turns the Port On

                          curl -X GET http://admin:admin@192.168.5.66/API? -d port=12 -d action=Mode -d value=01

                          Results in a returned statement:

                          { “Port”:”12″, “SetMode”:”1″, “ModeA”:”0x80″, “ModeB”:”0x80″ }

                          From the command shell, the commands would look like this:

                          Technical Specifications

                          Product Specifications

                          Data + PoE Ports 24
                          Data Ports 25
                          Data Rate Gigabit
                          DC connector 2 x 2.1mm DC / 2 x Phoenix connectors
                          Dimensions 1.5 x 19 x 3.5 inches
                          Display Type OLED
                          Input Voltage Range 48 – 55 Volts DC
                          Max Power for Kit 60 Watts (Active IEEE 802.3bt negotiation) / 80 watts (Managed passive configuration)
                          Mount Type Rack
                          Operating Humidity 10% to 90%
                          Operating Temperature Range 0-40 C
                          PoE Method Active / Passive
                          PoE Mode/Pinout Mode A / B
                          PoE Standard IEEE 802.3bt Type 3;
                          4 Pair PoE;
                          Mode A / B negotiation
                          Weight 4.5 lbs

                          If you find this learning center helpful, like and subscribe on your social channels to learn when we post new guides!

                          GPOES-24-2-55v390w

                          GPOES-24-2-55v390w

                          GPOES-24-2-55v390w

                          Welcome to the PoE Texas Manual for the 24 port LCD Managed PoE switch!

                          The purpose of the manual is to help you quickly and effectively navigate the installation and functions of your new Power Over Ethernet Switch.

                          Our goal is to make our products as intuitive and simple to use as possible, so we value your feedback and questions directly to us at service@poetexas.com. Phone +1-512-479-0317.

                          Or you’re always welcome to leave questions or comments on our product page: GPOES-24-2-55v390w.

                          What’s Inside

                          PARTS LIST:

                          • 1 X POE SWITCH
                          • 1 X USER GUIDE
                          • 1 X POWER CORD
                          • 2 X RACK MOUNT BRACKETS
                          • 8 X SCREWS (FOR RACK MOUNT)
                          • 4 X RUBBER ADHESIVE FEET

                          General Installation

                          Your new PoE switch is designed to be simple to install and set up. You should only need at most a Philips head screw driver. To power it on, plug the power cable in the back.

                          Since this is an IEEE 802.3at (PoE+), you can just start plugging devices into it to eight PoE ports on the left hand side marked 1 through 24.

                          Ports 25S and 26S are for Small Form-factor Pluggable (SFP) fiber optic ports. There are two of them to allow you to create a self-healing ring network.  If you’re just using Ethernet, you can use ports 23 and 4 for the same purpose.

                          Desktop Installation

                          STEPS:

                          1. Remove the adhesive backs from the rubber feet accessories and place them on the bottom of the housing in the square indentations for these
                          2. Plug the switch into an outlet
                          3. Start plugging in your PoE and non-PoE devices

                          *The rubber feet help the switch have the proper ventilation, so please don’t skip that step.
                          Yeah, it is that simple.

                          Rack Installations

                          The switch comes with brackets for a 19″ rack configuration.  Please contact us if you need a different rack.  It DOES NOT come with the nuts and screws to mount the switch onto the rack.  You’ll need to get those

                          STEPS:

                          1. Using the 8 x small screws provided in the box, attach the two rack brackets to either side of the switch so that the brackets face the front as in the image above
                          2. Using rack screws and nuts (not provided) mount the switch into the rack space (the switch will use 1u of rack space)
                          3. Plug the switch into an outlet
                          4. Start plugging in your PoE and non-PoE devices

                          Operating The LCD Screen

                          Main Display

                          When you plug in the PoE switch, it will automatically boot up to the PoE Texas screen. Then, the main monitoring screen will come up. This screen gives you a great heads up display on the PoE situation with the whole switch.

                          So why make a PoE switch with a display like this rather than just a managed switch? We’re considering the smart building situations where networks and infrastructure aren’t always in place when you need to start installing and testing new PoE devices such as lighting, displays, or sensors. This display screen allows a user to see and manage the PoE on devices without having to have the full network installed and turned up.

                          So what does it all mean?

                          First Column: This identifies the port numbers, including the two uplink ports 9 and 10

                          Second Column: The power status of the port.  See guide to terms below.

                          Third Column: The entering data rate from the device used on the port (in Mbps)

                          Fourth Column: The exiting data rate from the device (in Mbps)

                          If the data rate turns red, then the port is exceeding its bandwidth settings.

                          PB: The maximum power available on the switch

                          TP: The current output power of the entire switch

                          PD: The number of powered devices connected to the switch

                          Norm: The switch configuration mode.

                          Options: (Norm – Normal switch; VLAN – All ports have their own VLAN; CCTV – CCTV camera set up.  See section on Menu item 1 Switch Mode)

                          What Do the Codes In Column 1 Mean?

                          —-W: Nothing is drawing power on this port
                          OLP: Over load protection has triggered on this port, meaning you device is drawing too much power for the port (see section on Port Power).
                          ULP: Under load protection has triggered on this port, meaning the device is drawing too little power to keep the PoE live on the port.
                          SCP: Short Circuit Protection, meaning the device or the cable connected to this port has short circuited. You’ll need to replace somethings.
                          OFF: When green or white, the port has been set to “off” in the settings
                          When red, the data rate used by this port exceeds the set max. If this happens 10 times in 1 hour, the port will power down to protect the switch and other devices.

                          Switch Bandwidth

                          Switch Bandwidth allows you to limit how much of the switch’s bandwidth a particular port can use.  Let’s say you’re worried some guy will mine crypto currency through this switch.  You can set the switch to alert you here that a single port is taking more bandwidth than the setting.

                          PD Type

                          PD Type gives you control to override the Powered Device negotiation on the switch.
                          • Standard: Your devices will negotiate the type of PoE and the classification
                          • Enhance: Regardless of the device negotiation, this setting allows the port to deliver up to AT power and the settings you put in the PSE Port Power
                          • LegacyNot used very frequently, this allows the switch to negotiate with a capacitance tag Powered Device
                          Unless you have a specific application or some unusual devices, you’ll likely just keep it on Standard.

                          PD Alive

                          PD Alive lets you set up an automatic reboot function for a port. Let’s say you have a security camera on the port, and it stops communicating for whatever reason. This feature here allows the PoE switch to take over and reboot the port to see if the device will come back on.

                          Use the up and down arrows to navigate to the port you want to have this feature on. Press “Enter” until the “Disable” is green. Then, press “Up” or “Down” until you see “Enable”.

                          Then press “Enter” again to set up the Start Up time using the up/down buttons: how long in seconds the device should take to start up.


                          Then “Enter” again to set the Interval time using the up/down buttons: how long in seconds the switch should wait to see if the device comes back up again.

                          Then “Enter” one last time to set the PowerOff time using the up/down bottons: how long it should stay off when it turns off.

                          When you’re done, use the “Back” button multiple times to exit to the main menu.

                          PSE Power Fine

                          PSE Power Fine allows you to adjust the residual power output of the ports so they can output more power as long as you have enough Total Power Budget (TB). This is used in some specific applications where you know your devices are riding right at the 25 watt limits of PoE+, say with a PTZ camera or a large Wifi access point (some of the high performance Cisco WAP’s fall into this category if their USB ports are turned on).

                          Depending on your situation you can add 5%, 10%, and 15% to the Power Budget (PB).

                          Use the up and down arrow buttons to select the option preferred, then use the “Enter” button to select it.  When the < is next to the setting and green, your option is selected.  “Back” out to the main menu.

                          PSE Port Priority

                          PSE Port Priority sets the priority for which ports will pull more power if the Power Budget (PB) of all the ports exceeds the Total Power Budget (TB) at any time.

                          Let’s say you have security cameras, phones, and wifi access points on your switch, and you’re right at the TB of the switch. If you want to make sure your security cameras stay live even if one of the wifi access points start to draw too much power, then the switch will prioritize the ports based on these settings.

                          By default, the lower number ports (1, 2, 3 . . . ) are higher priority. If you set both ports 1 and 2 at “High” priority, then port 1 will prioritize over port 2 in case of a conflict.

                          With the port numbers highlighted green, use the up and down buttons to select the port number.  Select “Enter”.  Then, use the up and down buttons to select the priority.  You have selected one when it is green and has the < next to is.  Then “Back” to the main menu.

                          PSE Port Enable give you the control to be able to turn on and off the power on any port. This ideal for infrastructure or IOT situations where the network may not be turned up for some time but the devices need to be installed, powered on, and tested during installation.

                          With the port number green, use the up and down buttons to select a port number. Then, press “Enter”. Use the up and down buttons until the “Enable” or “Disable” is green. Then press enter.

                          “Back” to the main menu.

                          PSE Port Power

                          PSE Port Power gives you control of whether a port can run at higher power than the traditional PoE standard. For example, you have a Thinlabs all-in-one PoE computer that you know you’ll use hard and add a lot of USB devices to. Rather than worry about your power budget, you can increase your power limit all the way up to 36 watts. Or, if you know your device will be small and you want to save on your PB, you can set the power consumption as low as 2 watts.

                          As before, while the port number is green, use the up and down buttons to select a port. Then press “Enter”. With the power green, use the up and down arrows to set the power limit on the port. “Back” to the main menu.

                          Note: This function is different from the PSE Power Fine function because that sets the fine auto adjustments, while PSE Port Power lets you set the big ranges.

                          In order to take full advantage of the PSE Port Power feature, you need to make sure the switch is set to “Enhanced” on the PD Type menu.  Otherwise you’ll receive this error.

                          LCD On/Off

                          LCD ON/OFF gives you control over how long the LCD screen will remain active after the last use.

                          Simply use the up and down buttons to select your setting, then press “Enter”. The selected setting will turn green and be immediately ready to use. Press “Back” to get to the main menu.

                          Fan Control

                          Fan Control gives you control of when the cooling fans will turn on. It’s based on the percent of the Power Budget (PB) used at the time. This allows you to keep the switch quiet until heat demands force it on.

                          Caution, though, setting the value too high in a warm environment like a packed server rack could allow the switch to go above the rated temperature limits.

                          Simply use the up and down buttons to select your setting, then press “Enter”. The selected setting will turn green and be immediately ready to use. Press “Back” to get to the main menu.

                          Language

                          You can select your Language on this menu.  Currently, Chinese and English are available.  Other languages can be added by request.

                          Simply use the up and down buttons to select your setting, then press “Enter”.  The selected setting will turn green and be immediately ready to use.  Press “Back” to get to the main menu.

                          Default Setting

                          DEFAULT SETTING restores the switch to factory default settings.  

                          Simply use the up and down buttons to select “Confirm”, then press “Enter”.  The selected setting will turn green and be immediately ready to use.  Press “Back” to get to the main menu.

                          About

                          The About menu gives you diagnostic information about model and software version of your device.

                          Technical Specifications

                          AC Plug Connector Type C14
                          Adapters included Yes
                          Cable connector length 3 ft
                          Certifications CE, FCC,
                          Data + PoE Ports 24
                          Data Ports 2 SPF
                          Data Rate Gigabit
                          Dimensions 17.32″ x 9.133″ x 1.77″ in.
                          Display Type Bright LCD
                          Input Voltage Range 120 / 220 VAC
                          LEDs Per Port 1 – Connections and activity
                          Max Power for Kit 390 watts
                          Mount Type wall and rack (accessories included)
                          Operating Humidity 10% to 90%
                          Operating Temperature Range 0 – 40 C
                          Output Voltage 55 volts
                          PoE Method IEEE 802.3af; IEEE 802.3at
                          PoE Mode/Pinout Mode A (-1,2 +3,6)/Mode B (+4,5 -7,8)
                          PoE Standards Supported IEEE802.3, IEEE802.3u, IEEE802.3ab, IEEE802.3z, IEEE802.3az, IEEE802.3x IEEE802.3af, IEEE802.3at

                          If you find this learning center helpful, like and subscribe on your social channels to learn when we post new guides!

                          GBTS-10-8-55V370W Manual

                          GBTS-10-8-55V370W Manual

                          Welcome to the PoE Texas Manual for the GBTS-10-8-55V370W!

                           The purpose of the manual is to help you quickly and effectively navigate the installation and functions of your new GBTS-10-8-55V370W

                           Our goal is to make our products as intuitive and simple to use as possible, so we value your feedback and questions directly to us at service@poetexas.com.  Phone +1-512-479-0317.

                           Or you’re always welcome to leave questions or comments on our product pages: GBTS-10-8-55V370W

                          What’s Inside

                          PARTS LIST:GBTS-10-8-55V370W

                          • 1 X PoE Switch
                          • 1 X Rack Mount Kit – Does NOT include the rack nuts and bolts!
                          • 4 X Desk Mount Rubber Pads
                          • 1 X AC Cable


                          You have everything you need to get your switch up and operating.  Let’s get started.


                          GENERAL INSTALLATION


                          To deploy your new uPoE or IEEE 802.3bt switch, you really only need three key things:

                          1. AC power – 120 VAC 60 Hz or 220 VAC 50 Hz – 500 watts
                          2. Gigabit Uplink Data on the RJ45 por or Small Form-Factor Pluggable Fibers slot
                          3. Space:
                          • 1 unit of 19″ rack space
                          • 17 1/2″ wide by 9 1/2″ long desk space

                           * Optional: If you’re rack mounting it, you do need nuts and bolts to mount it on the rack.

                          That’s it!  It’s designed to be a simply, cost effective, high powered switch you can implement quickly.  You don’t need configuration cables, software downloads, apps, or certifications to use it!


                          Your switch has eight Gigabit PoE ports, two Gigabit data only ports, two SFP slots, and an LCD status display.  Not a lot to worry about here.  Let’s show you how it goes together.

                          Put it together:

                          DESK MOUNT:

                          If you’re going to set this on a desk or a shelf, you simply stick the included rubber feet on to the bottom of the switch in the small square indentations provided.  You don’t have to screw on the rack wings unless you just like the look of them.

                          RACK MOUNT:

                          If you plan to mount this into a rack, simply use the small screws to attach the rack mount wings.  You’ll need a small philips head screwdriver for this.


                          The kit does not come with the hardware to mount it to the rack, so don’t forget to pick those up.

                          Now you can plug it in using the included AC cable to power it up.If you’re grounding your network*, you can use the earthing lug on the back of the switch.* You might be tempted to overground your network.  Only ground your network in one location and ground it well.  Adding more than one grounding point could actually introduce noise to your network.gs.

                          Let’s power this thing on and configure it!

                          CONFIGURATION

                          Okay, I told you there wouldn’t be any configuration.  I lied.  You do have to pick whether your network needs IEEE 802.3bt Type 4 PoE or uPoE.  There’s a table down below that will layout the technical details, but here’s what you really need to know:

                          IEEE 802.3bt will be compatible with newer, higher power devices that say IEEE 802.3bt.

                          uPOE will be compatible with pre-standard devices that typically say PoE++ or UPOE.


                          I tell you this now so you can decide before you start connecting your devices.  All you need to do is slide the selector switch to the type of PoE you’d like.  See, not so bad afterall.

                            ON THE LCD SCREEN:

                            The LCD screen will tell you a lot about what’s going on really quickly with your network.  You can:

                            • See how much power your device is drawing or whether it’s on or off
                            • If your device is having an issue because of underloading*, overloading, or a short circuit
                            • What your total output power is and what your power budget is


                            *Underloading is a condition where your PoE device isn’t drawing enough power to keep the PoE on.   If you’re using a PoE splitter, you can try plugging a device into to start drawing power.  Otherwise, contact us at service@poetexas.com for support.

                            LED LIGHTS: All the fun blinky lights!

                            The table here shows all the details.  What you really want to check for is that the only light blinking is the LNK/ACT lights.  If other lights are blinking, you have an issue.

                            Technical Specifications

                            Product Specifications

                            AC Plug Connector Type C14
                            Data + PoE Ports 8
                            Data Ports 4 (2-Gigabit and 2-SPF)
                            Data Rate Gigabit
                            Display Type LED
                            Input voltage 110 – 220 VAC
                            Max Power for Kit 370 Watts
                            Max Voltage 55 Volts
                            Mount Type 1U Rack Mount
                            Operating Humidity 10% to 90%
                            Operating Temperature Range 0-40 C
                            Output Voltage 55 Volts
                            PoE Method IEEE 802.3bt
                            PoE Standard IEEE 802.3bt
                            PoE Standards Supported uPoE, IEEE 802.3bt

                            If you find this learning center helpful, like and subscribe on your social channels to learn when we post new guides!

                            GBT-NUC

                            GBT-NUC

                            GBT-NUC Installation Manual


                            Welcome to the PoE Texas Manual for the GBT-NUC!

                            The purpose of the manual is to help you quickly and effectively navigate the installation and functions of your new PoE NUC Lid.

                            Our goal is to make our products as intuitive and simple to use as possible, so we value your feedback and questions directly to us at service@poetexas.com.  Phone +1-512-479-0317.

                            Or you’re always welcome to leave questions or comments on our product pages: GBT-NUC.

                            What’s Inside

                            PARTS LIST: GBT-NUC

                            • 1 X Gen 7 Form Factor NUC Lid
                            • 1 X Gen 8 & 10 Form Factor NUC Lid
                            • 1 X IEEE 802.3bt/uPoE Adapter
                            • 1 X Ethernet Patch Cable
                            • 1 X Power Patch Cable

                            You have everything you need to fit most models of the NUC.


                            GENERAL INSTALLATION


                            Besides the GBT-NUC kit, you will need the right kind of PoE installed. NUC’s can draw a fair amount of power, so you really need an IEEE802.3bt or uPoE switch or injector.  For example, you can use our BT-1-55v60w-IN, which is our indoor IEEE 802.3bt dual signature injector you can find on yourfavorite sales channel.  This injector allows you to add IEEE 802.3bt power to any PoE or non-PoE switch.


                            Otherwise, yes, you can use your Cisco uPoE devices, and we have notes in the configuration section on how to configure the port for the POE NUC lid. 

                            Put it together:

                            The installation is simple and fast to accomplish. The hardest step is making sure you have the right lid model installed on your adapter.  Let me show you how it’s done. 


                            The form factor information is in the part number.  Flip it over and check outthe part number.  Find the first “i” then the number before that is the model number you need for the lid.  In this case, it is the “8”.  Simply check whether the underside lid is labeled with the same number, “7” or “8”.  If you have the wrong lid on, no problem!  Simply unscrew the lid and screw on the correct lid.

                            The installation is simple and fast to accomplish. The hardest step is making sure you have the right lid model installed on your adapter.  Let me show you how it’s done. 

                            • The form factor information is in the part number.  Flip it over and check outthe part number.  Find the first “i” then the number before that is the model number you need for the lid.  In this case, it is the “8”.  Simply check whether the underside lid is labeled with the same number, “7” or “8”.  If you have the wrong lid on, no problem!  Simply unscrew the lid and screw on the correct lid.

                            • Now, remove the lid from your NUC. Look for these little openings, and gently start pulling up.

                            • Now, the next thing to consider are these funny rubber pads.  These are your thermal pads.  They help manage the heat from the NUC lid.  Simply place these in these configurations depending which NUC lid model you have.

                            • Then, gently place the lid on your NUC.  Once it’s in place, a little pressure will clip the lid on.


                            • Finally, use the included patch cable to connect the LAN port to the ethernet port of your NUC and the DC power cable to the DC port of the NUC.  And you’re ready to connect the power to the PoE port.  Your NUC should start to boot right away.

                            CONFIGURATION

                            Configuring Your GBT-Nuc

                            You’re not required to do any configuration with IEEE 802.3bt switches and injectors. The PoE NUC lid will work right away.   Cisco uPoE switches do require some configuration on the switch to enable the right PoE for the PoE NUC Lid.


                            However, if you’re using Windows, there’s a best practice we’ve found I like to do.  Simply type “Power & Sleep settings” in the search bar at the bottom.  Select “Additional Power Settings”.  “ChangePower Settings”.  Choose the “Balanced” settings to keep the NUC from spiking power.

                              Technical Specifications

                              Product Specifications

                              Certifications CE, RoHS, FCC
                              Data + PoE Ports 1
                              Data Ports 1
                              Data Rate 10/100/1000
                              DC connector 5.5 x 2.5
                              Max Power for Kit 60 watts
                              Mount Type NUC Lid for Gen 7, 8, and 10 form factors
                              PoE Standards Supported uPoE (Four Pair PoE) and IEEE 802.3bt dual signature

                              If you find this learning center helpful, like and subscribe on your social channels to learn when we post new guides!

                              BT-1-55V60W; BT-1-55V60W-IN

                              BT-1-55V60W; BT-1-55V60W-IN

                              802.3bT PoE Injectors

                              Welcome to the PoE Texas Manual for the BT-1-55v60w-IN that cost effectively upgrades any non-PoE or PoE port to IEEE 802.3bt and 60 watts!

                              The purpose of the manual is to help you quickly and effectively navigate the installation and functions of your new Power Over Ethernet Midspan. 

                              Our goal is to make our products as intuitive and simple to use as possible, so we value your feedback and questions directly to us at service@poetexas.com.  Phone +1-512-479-0317.

                              Or you’re always welcome to leave questions or comments on our product pages: BT-1-55V60W, & BT-1-55v60w-IN.

                              What’s Inside

                              BT-1-55v60w

                              PARTS LIST:

                              • 1 X Midspan Injector with built in 6KV Surge Protection (designed for indoor use only)
                              • 1 X AC Power Cable


                              Additional items you’ll need not included:

                              1 – Screws for mounting

                              2 – Patch cables to the switch and home run cables to the device

                              BT-1-55v60w-IN


                              PARTS LIST:

                              • 1 X Midspan Injector (without surge protection- designed for indoor usage only)
                              • 1 X AC Power Cable


                              Additional items you’ll need not included:

                              1 – Screws for mounting

                              2 – Patch cables to the switch and home run cables to the device

                              General Installation

                              A midspan like the BT-1-55v60w & BT-1-55v60w-IN are a simple device to add on to a network port, and the purpose is to add or increase the PoE of that port without having to upgrade or pick a less optimal switch.

                              With this wall mounted device, simply mount it near the networking switch you’d like to pair it with.  Then, using a short Ethernet patch cable from the switch’s data port to the LAN port on the PoE midspan.   Then the POE port adjacent to the LAN port will now have that IEEE 802.3bt (60 watts) power budget and up to gigabit pass through data.

                              The BT-1-55v60w is also surge protected, so, while it cannot be mounted outdoor, you can connect it to outdoor devices with confidence.  In order to make the surge protection fully functional, you will need to properly ground the connector on the side of the device.

                              Not sure what grounding is?  Panduit has some great graphics around grounding.

                              CONFIGURATION

                              There is no configuration necessary with this device.  Simply plug it in.

                              • The green LED indicates power on and drawing less than 30 watts.  If the light turns blue, it indicates the port is drawing more than 30 watts of power.   
                              • If the green light begins to blink at any time, it could indicate there is a short in the circuit or a compatibility issue.


                              STEPS TO TROUBLESHOOT:

                              1 – At the injector, disconnect the PoE port from your device.  Use a PoE Tester to confirm the device is able to power on using a short jumper cable.

                              2 – At the other end of the network cable to your device, disconnect the device and use the PoE Tester to confirm it is able to negotiate PoE.

                              3 – Connect the PoE Tester to the end device to monitor power consumption.


                              If you’re able to power on the device with the PoE Tester inline, it’s likely a compatibility issue.  Please contact us at service@poetexas.com to find you the right solution.

                              Technical Specifications

                              Product Specifications

                              AC Plug Connector Type C14
                              Adapter length 3 ft
                              Certifications UL/CE/FCC
                              Data + PoE Ports 1
                              Data Ports 1
                              Data Rate Gigabit
                              Dimensions

                              6KV Model – 7.6 x 3.3 x 1.6 in.

                              Indoor Model – 6 x 2.6 x 1.4 in.

                              Display Type LED – Green (802.3at) ; Blue (802.3bt)
                              IEC Protection Class IP 40
                              Input Frequency Range 50/60 Hz
                              Input voltage 100 – 240 VAC
                              Load Regulation 6KV Surge Protection on Select model as indicated (BT-1-55V60W)
                              Max Current 1.1 Amps
                              Max Power for Kit 60 Watts
                              Max Voltage 55 volts
                              Max. Amps Per Port 1.1 Amps
                              Mount Type Wall
                              Operating Humidity 20% to 80%
                              Operating Temperature Range 0 – 40C
                              Output Voltage 55 volts
                              PoE Method IEEE 802.3af, IEEE 802.3at, IEEE 802.3bt
                              PoE Mode/Pinout Mode A (-1,2 +3,6)/Mode B (+4,5 -7,8)

                              If you find this learning center helpful, like and subscribe on your social channels to learn when we post new guides!