Welcome to the PoE Texas Manual for the GATS-6-4-52V65W!
The purpose of the manual is to help you quickly and effectively navigate the installation and functions of your new GATS-6-4-52v65W.
Our goal is to make our products as intuitive and simple to use as possible, so we value your feedback and questions directly to us at service@poetexas.com. Phone +1-512-479-0317.
Or you’re always welcome to leave questions or comments on our product pages: GATS-6-4-52v65w.

What’s Inside

PARTS LIST:GATS-6-5-52v65w
- 1 X PoE Switch
- 1 X AC Cable
- 1 X Manual
You have everything you need to get your switch up and operating. Let’s get started.
GENERAL INSTALLATION
To deploy your new PoE+ or IEEE 802.3at switch, you really only need three key things:
- AC power – 120 VAC 60 Hz or 220 VAC 50 Hz – 65 watts
- Gigabit Uplink Data on the RJ45 port
- Space: 8″ wide by 5″ long desk or wall space
* Optional: If you’re wall mounting it, you do need screws and wall anchors.
That’s it! It’s designed to be a simply, cost effective PoE+ powered switch you can implement quickly. You don’t need configuration cables, software downloads, apps, or certifications to use it!
Your switch has four 10/100 PoE ports, two 10/100 Mbps data only ports, and LED indicator lights. Not a lot to worry about here. Let’s show you how it goes together.

Put it together:
DESK MOUNT:
If you’re going to set this on a desk or a shelf, you simply place the switch into the location where you need it close enough to the outlet and network connection to your router or switch.
WALL MOUNT:
If you plan to mount this on a wall, simply use two wall screws 7.1″ apart to hang the switch on the wall. You’ll need a small philips head screwdriver for this.
Now you can plug it in using the included AC cable to power it up. If you’re grounding your network*, you can use the earthing lug on the back of the switch.* You might be tempted to overground your network. Only ground your network in one location and ground it well. Adding more than one grounding point could actually introduce noise to your network.

Let’s power this thing on and configure it!
CONFIGURATION
Okay, you’re done configuring. The switch will work right out of the box.
You can choose to change the settings on all the ports by selecting VLAN, which will create virtual local area networks for each port so that port 1 will not communicate with port 2, etc. for a more secure network. Or you can choose to “Extend” the range which will allow the PoE ports to communicate up to 10 Mbps up to 250 meters (820 ft).

LED LIGHTS: All the fun blinky lights!
What you really want to check for is that the LNK/ACT light is blinking properly. The LED should blink green indicating communication is happening with your device.
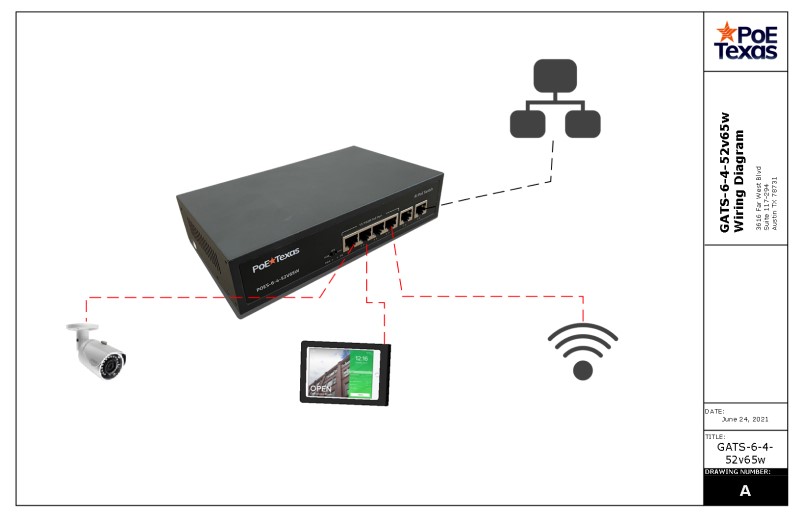
WIRING

Technical Specifications
Product Specifications
| AC Plug Connector Type | C14 |
| Adapters included | Yes |
| Cable connector length | 3 ft |
| Certifications | CE, FCC, RoHS |
| Data + PoE Ports | 4 |
| Data Ports | 2 10/100 Mbps |
| Data Rate | 10/100 Mbps |
| Dimensions | 8″ x 5″ x 1.325″ in. |
| Input Voltage Range | 120 / 220 VAC |
| LEDs Per Port | 1 – PoE, Activity |
| Max Power for Kit | 65 watts |
| Mount Type | wall and desk |
| Operating Humidity | 10% to 90% |
| Operating Temperature Range | -20 – 50 C |
| Output Voltage | 52 volts |
| PoE Method | IEEE 802.3af; IEEE 802.3at |
| PoE Mode/Pinout | Mode A (-1,2 +3,6) |
| PoE Standards Supported | IEEE802.3, IEEE802.3u, IEEE802.3ab, IEEE802.3z, IEEE802.3az, IEEE802.3x IEEE802.3af, IEEE802.3at |
| Storage Temperature | -40-80 C |
